• There has been a recent cluster of spammers accessing BARFer accounts and posting spam. To safeguard your account, please consider changing your password. It would be even better to take the additional step of enabling 2 Factor Authentication (2FA) on your BARF account. Read more here.

What is a better do-it-yourself plastic repair

blackoutgsxr

New member
Joined
Aug 4, 2008
Location
San Jose
Moto(s)
07 gsxr 600
Name
Ruben
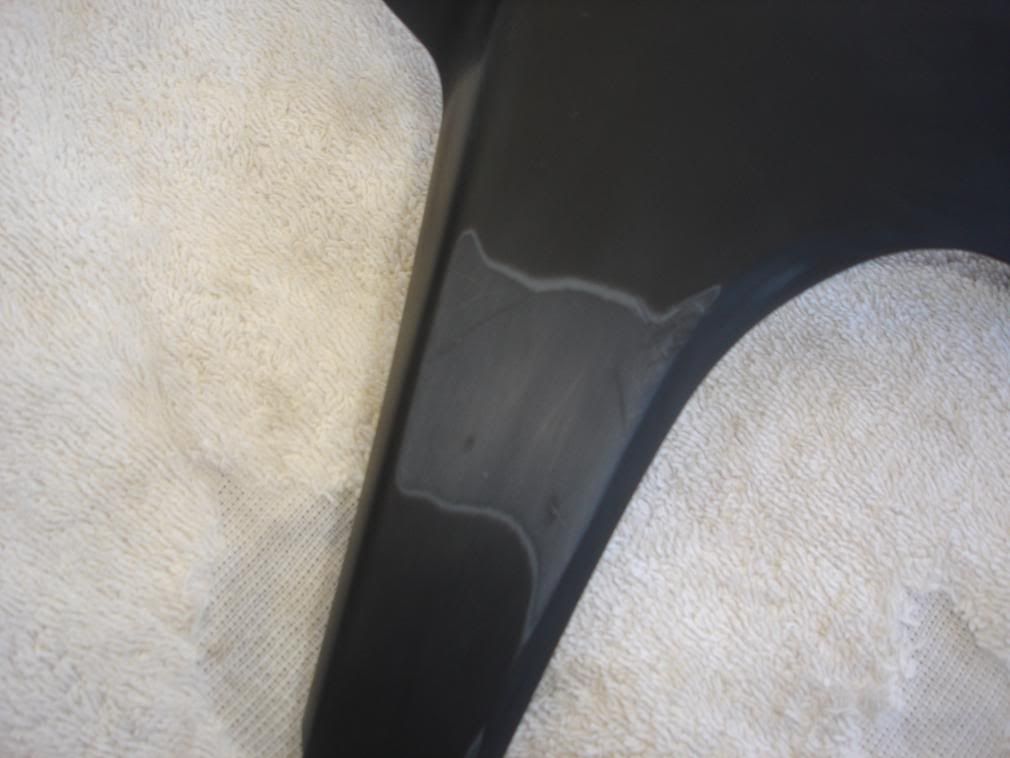
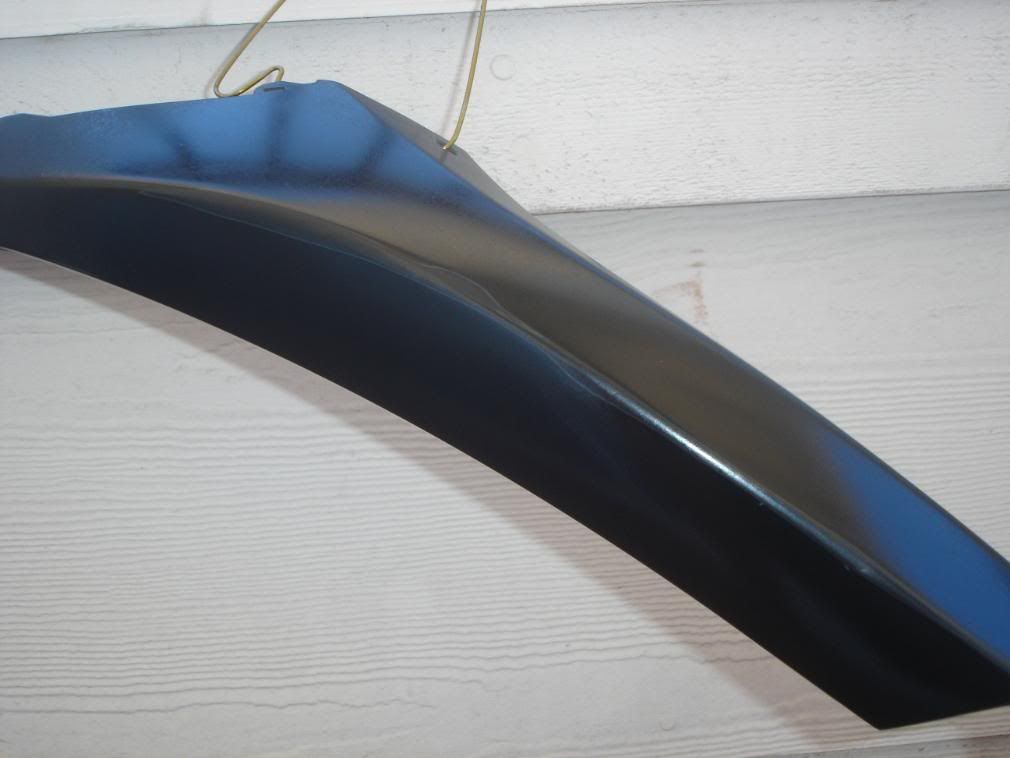
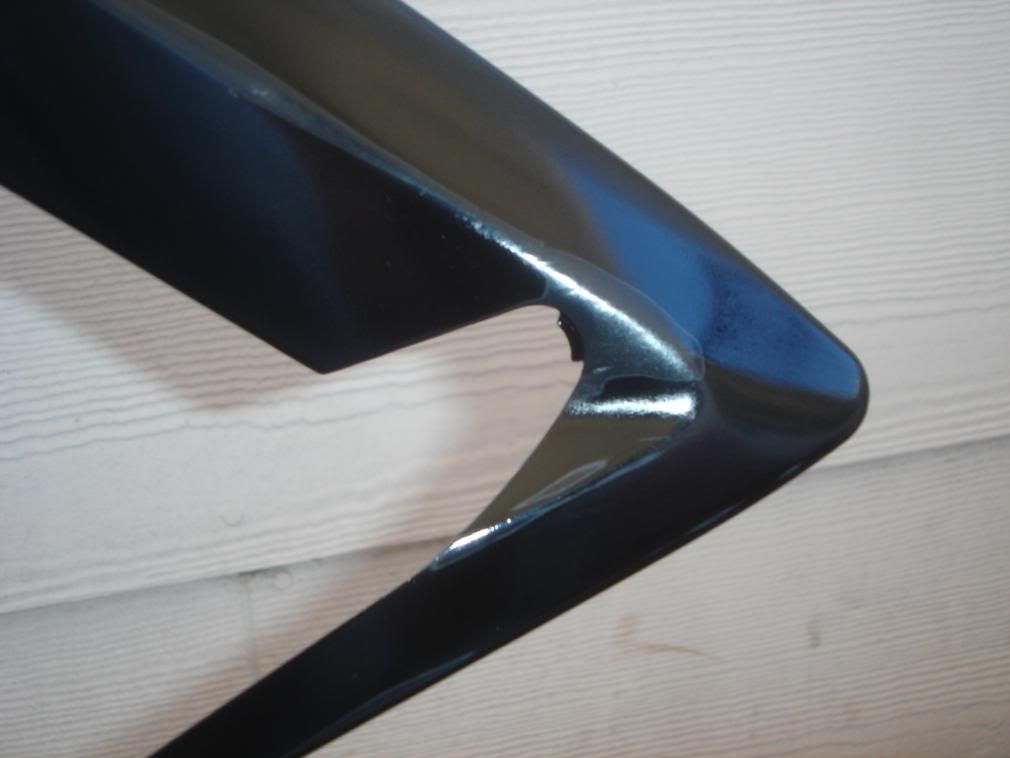
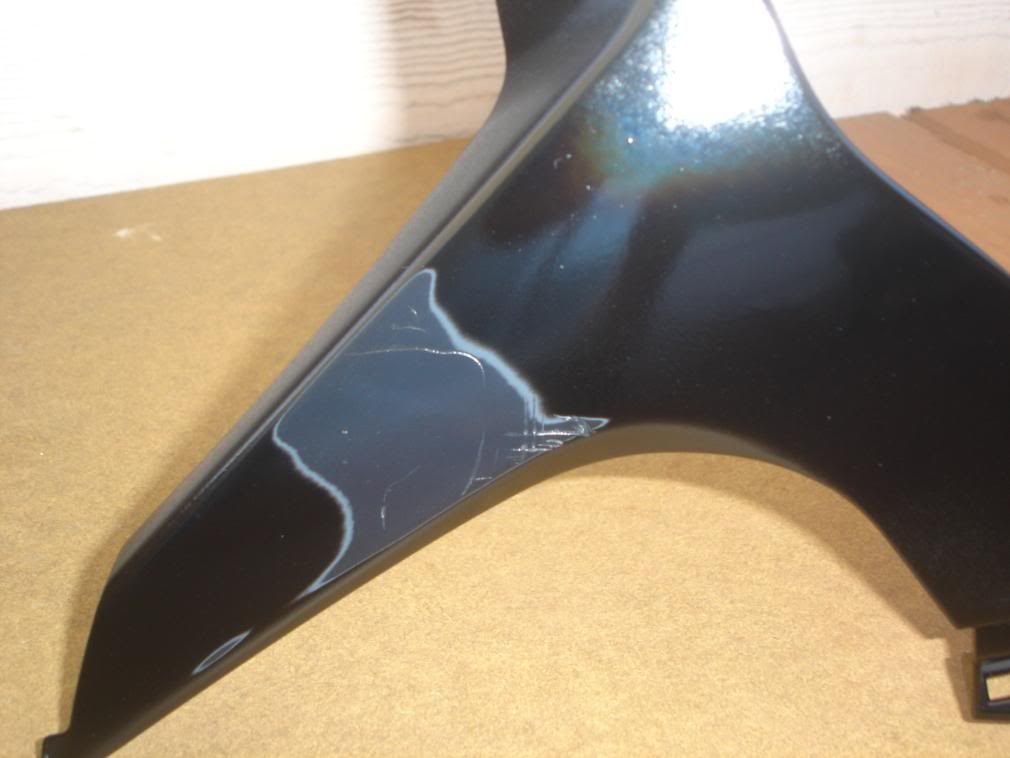
I am looking to fix some Fairings myself. i was wondering if any of you have used these products and if they are worth it. Basically i need a filler for some missing plastic and also to fill some deep scratches. If their is another product that is not listed please give a link. Tanks


http://plastex.home.att.net/

http://www.colorrite.com/product/col...r-kit-1060.cfm

Devcon Plastic Welder

or SEM @ the local auto body supplier (the problem is that it comes in bulk)


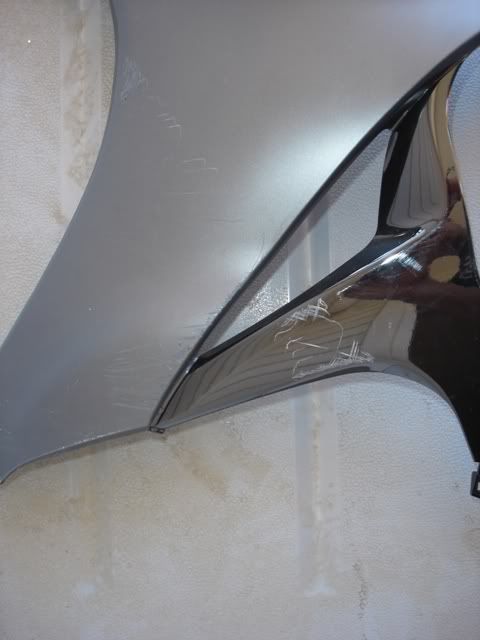
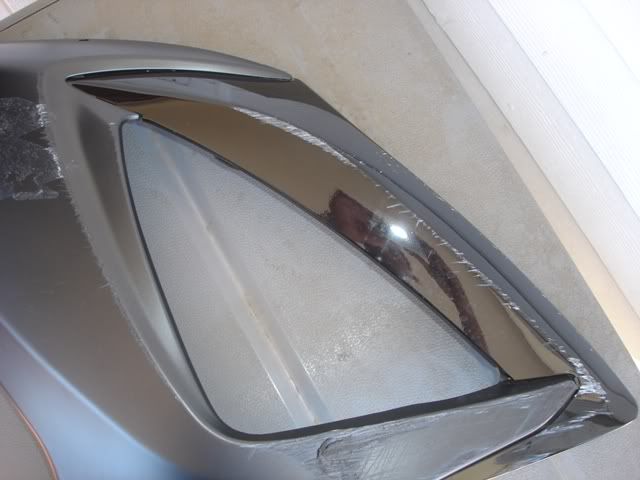
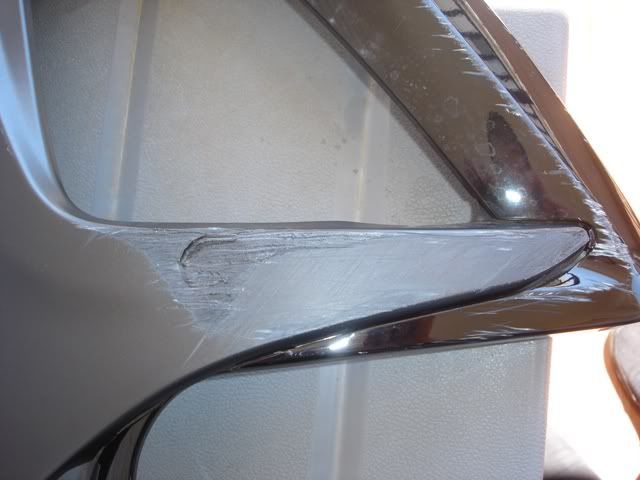
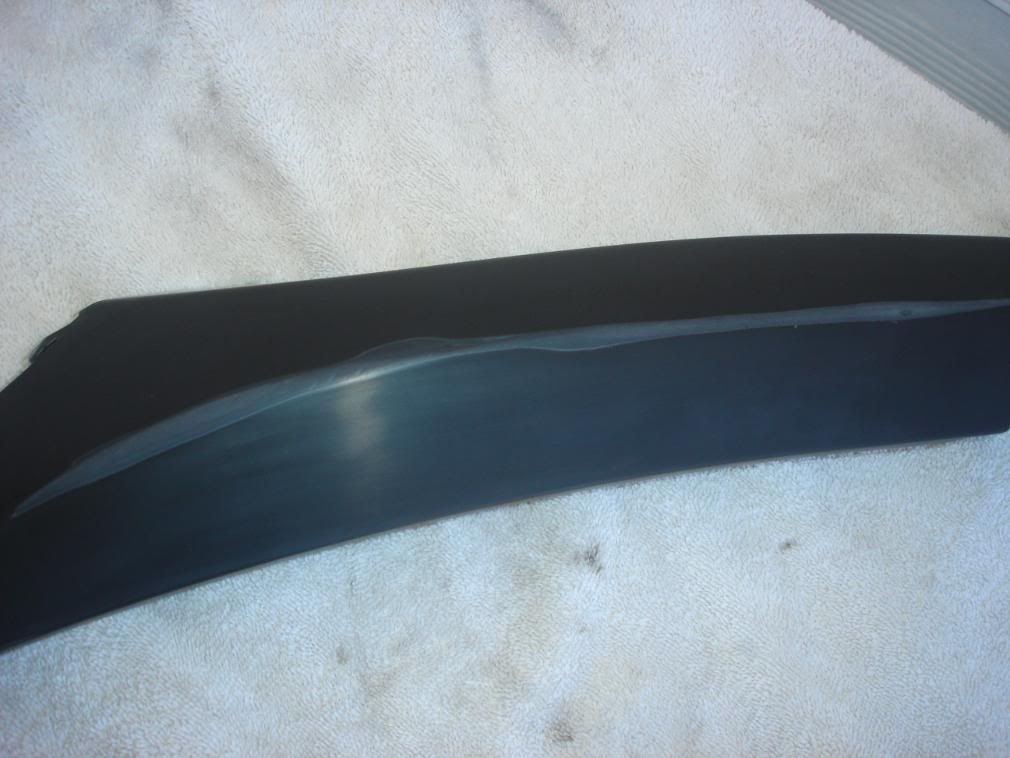
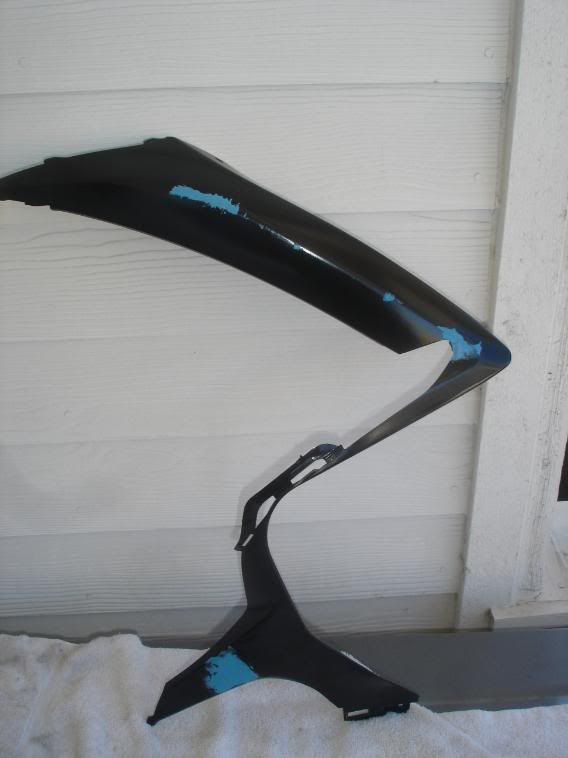
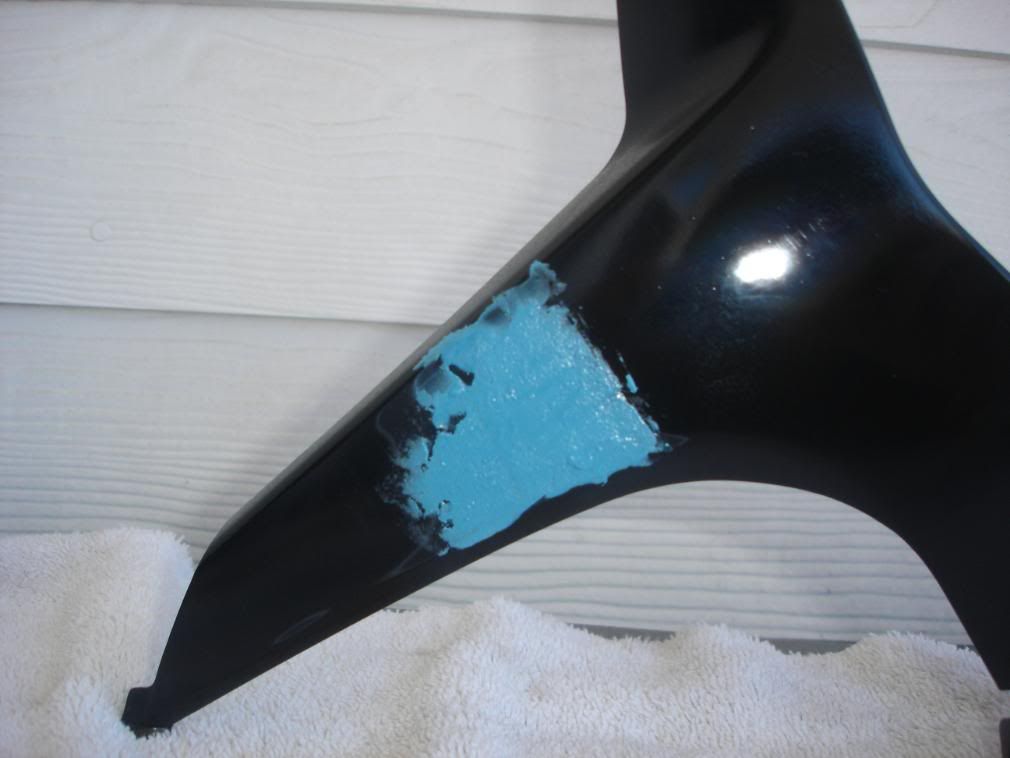
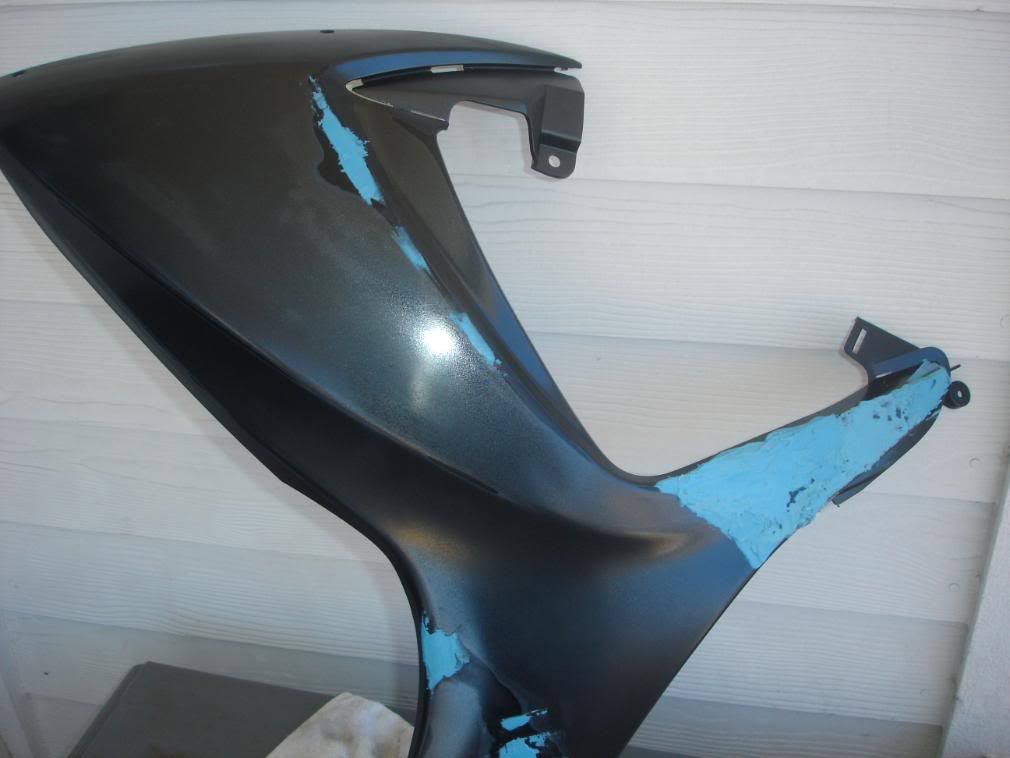
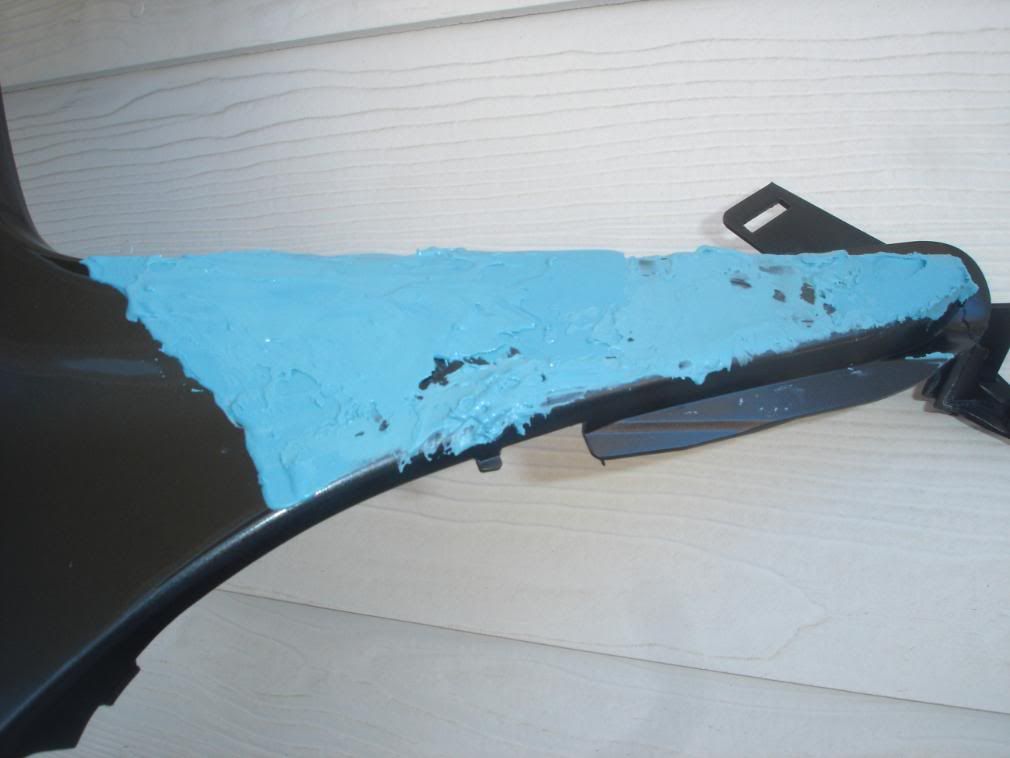
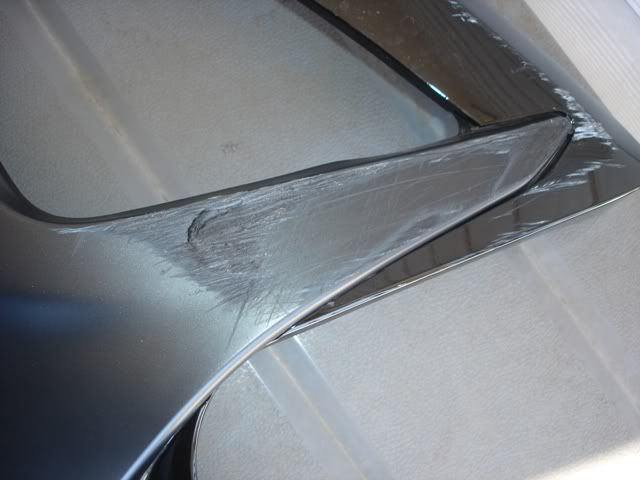
Here are some pictures of the damages.

plastics007.jpg

plastics002.jpg

plastics004.jpg

plastics003.jpg
 
I recommend you take it to Reckon, he does top-notch work and has a great turn-around time.

Get a quote from him, because I wouldn't be surprised to find that his price is the same as buying the tools and supplies yourself.
 
I recommend you take it to Reckon, he does top-notch work and has a great turn-around time.

Get a quote from him, because I wouldn't be surprised to find that his price is the same as buying the tools and supplies yourself.

+1 he knows his sheit. Also beyond the expense consider the learning curve, for these types of projects can be awfully steep.
 
From what i understand he only repairs clean cracks. and these plastics are pretty scuffed up.

Correct me if i'm wrong.
 
From what i understand he only repairs clean cracks. and these plastics are pretty scuffed up.

Correct me if i'm wrong.

I have a similar problem...

I'd say get the cracks repaired first, then take it to a different shop to get it sanded down (scuffs be gone) + re-painted.

Keep in mind, a brand new set of plastics runs arond $370 shipped from oneidasuzuki.com (the whole right side)
 
From what i understand he only repairs clean cracks. and these plastics are pretty scuffed up.

Correct me if i'm wrong.

I'll repair ANY broken fairing, rashed or not,...

I DO NOT PAINT, or do bodywork anymore (except in rare cases)

so I can get your fairings back in one piece, even if it's just shattered with pieces missing broken tabs, etc, but if the damage is extensive, or you've lost too much plastic from the road grinding the plastic away during the crash, I will have to weld it from BOTH sides, which leaves a strip of bare plastic where the weld bead is, so you'll have to go get it painted somewhere.

if it's a clean crack, often I can just weld it from the inside, which just leaves the line of the crack on the outside, and no damage to the existing paint, which can then be touched up with touch-up paint.

ok now for do it yourself stuffz:

FIRST you MUST ID the plastic in question: is it ABS?, is it polypro? is it fiberglass? or an "olefin" (polyethylene, TPO, etc,...) look on the inside surfaces there should be a ">ABS<" thingy (the letters will tell you what type of plastic it is, hopefully it DOES NOT SAY: >PS+PA6<, or anything with a "+" in it, because that will HAVE to be welded as it's an "alloy" or composite made from two different types of plastic, so if you DO have an 07 GSXR it'll be an alloy.

as far as your choices, the PLASTEX looks like the best one, I'd probably go with that one as the devcon sucks (unless your fairing is ABS), I couldn't get the color-rite link to work, and SEM's plastic goop does only come in bulk, and again really only works on ABS
there are a few others like FUSOR, and a couple by EVERCOAT which are both GREAT products, IF it bonds, and the only way to tell if it's going to bond is to test it.
this is why most plastic repairs are done by thermally welding these days, as the variety of plastics is just ridiculous and if you get the wrong type of goop for your particular plastic, it wont work.

if you do decide to do it yourself be sure to FOLLOW THE DIRECTIONS EXACTLY, especially the cleaning steps as those are critical to a good bond.

also if you DO try the plastex, please post the results and outcome, their advertising is quite convincing stating that it will bond even olefins AND composites, and I'd be interested to see if it does in fact work on the newer composite side panels.
 
Last edited:
So the plastics ARE OEM from an 07 GSXR.

Can you give me an estimate provided the pictures given in this thread?

Do you agree with Buring1 about me spending around the same?

Thanks
 
Last edited:
from what I see in the pics, it just looks like bad rash,..are there any cracks or breaks?

for the rash, everywhere you have bare plastic you would get some bulldog adhesion promoter, and follow the directions on the aerosol can to the freakin letter, it'll work like a primer or "tie coat" (which helps the next coat stick properly), then you use body filler right over the bulldog (I like z-grip from evercoat) and then sand the filler flat with about 80 or 120 grit on a hard block, once the area is all nice and flat, you'll need to touch up any bare plastic with another coat of bulldog, then you shoot some GOOD THICK PRIMER, like SEM, or U-Pol, wait a day, sand with 400 (wet if you prefer), and then paint, although that chrome/mylar paneling will be tough to replicate.

you need the bulldog so the filler and paints will stick to the composite plastic, but you only need it where you have bare plastic, the filler and paints will stick fine to the existing paint as long as you scuff it up well (400 NO SHINY SPOTS!)

I usually charge $25 to set up the welder and figure about 3 to 4 dollars an inch for welding the cracks, unless you have a million cracks or a shattered fairing that needs a piece fabricated and then I try to keep it reasonable, especially if you have some rare unobtanium that got scrunched.

if the costs start getting near 50% of the replacement cost, I usually suggest that you get a new piece especially since factory fairings come painted and decaled, just bolt it on and go.
 
Last edited:
^^^^^Bulldog rocks I use it on any plastic paint job. You can even buy it in a rattle can too, so it is super convenient for a DIY. It is specifically designed for the maleable properties of a plastic fairing, so you paint/clear can bend more.

Just be careful as with all things, too much of a good thing is too much. I learned the hard way once, went really thick and my f'ing paint blistered. Ended up sanding it back down to the base and restarting. Good thing it's only paint. just some :2cents

Oz
 
:thumbup

Thanks guys very helpful.

It seems like an interesting project.

And where can i get the Bulldog adhessive?
 
I saw bulldog "PAP" (plastic adhesion promoter) at kragen and OSH, but any autobody supply house will carry it as well.

and like Oz sed, get the aerosol can, it's just so easy to use.
 
I couldn't find bulldog PAP at Kragen or OSH

I did find Bondo For fiberglass and aluminum (universal) What are you thoughts?
 
don't buy the BONDO brand (it's made by DYNOTRON), it has more talc, and less resin than any other brand, and shrinks and cracks with age and should be avoided unless your just fixing a rat bike and don't really care.

find an autobody supply house, look in the yellow pages under "automotive paint supplies" or "color shop", or "finishmaster" (they have lots of stores) and go there, they will have good fillers, GOOD primers, and they SHOULD have bulldog in the aerosol can.

if you can't find a color shop, call a couple of body shops and explain your looking for a color shop, and where do they get their supplies, they should be able to give the names of several suppliers.

and lastly, you can probably order all this stuff online.
 
Last edited:
don't buy the BONDO brand (it's made by DYNOTRON), it has more talc, and less resin than any other brand, and shrinks and cracks with age and should be avoided unless your just fixing a rat bike and don't really care.

find an autobody supply house, look in the yellow pages under "automotive paint supplies" or "color shop", or "finishmaster" (they have lots of stores) and go there, they will have good fillers, GOOD primers, and they SHOULD have bulldog in the aerosol can.

if you can't find a color shop, call a couple of body shops and explain your looking for a color shop, and where do they get their supplies, they should be able to give the names of several suppliers.

and lastly, you can probably order all this stuff online.

+1

bondo=teh suk. I use a sexy fiberglass short strand filler, really easy to set and sands out great with no noticeable long-term shrinkage.

Local auto paint shops are usually really helpful to DIY'ers just make sure that they understand exactly what you project entails.

If you order online make sure to check the hidden shipping/hazmat fees. I know many peeps that have gotten raped by these ridiculous costs.

Oz
 
Oz,

Are talking about the 3M product or everclear?

And does it work on the allow OEM plastics?
 
Last edited:
I use the Everclear: http://www.sjdiscounttools.com/fib632.html

You can't go wrong with any 3M product, in my short lived life I have never heard anyone bad mouth 3M products. Prolly because most peeps (like me) can't afford it. :x

For the filler, follow the directions on the can, super easy. Keep in mind some tips:

1. Make sure you mix in the activator well.

2. Practice with it to get used to how to spread it on and how fast it dries.

3. Put on enough (not too much) to make sure that you can recreate the desired surface shape/contour. Keep in mind that your going to sand it down to perfect it, so dont go over board. I recently heard a cool trick to use a poker card to apply it.

4. I usually let it dry overnight to make sure that it has set properly. When in doubt do the scientifically proven :) smell technique. Most chemicals (filler, primer, sealer, base coats, and clear coat) that are used in auto painting eminate less and less smell as they cure properly. This is especially a good way to determine if your clear coat has cured properly.

5. Check what you have done in really bright light/sunlight. Small defects are hard to detect untill you are done with the paint, then your fukd. Looking at the work from all angles will help you to avoid this.

There is a lot to keep in mind, but don't let it discourage you from the illustrious life of the DIY'er. Remember that it's only paint!
 
Oz & Reckon.

I really do appreciate the opinions and experiences that you both have shared with me.

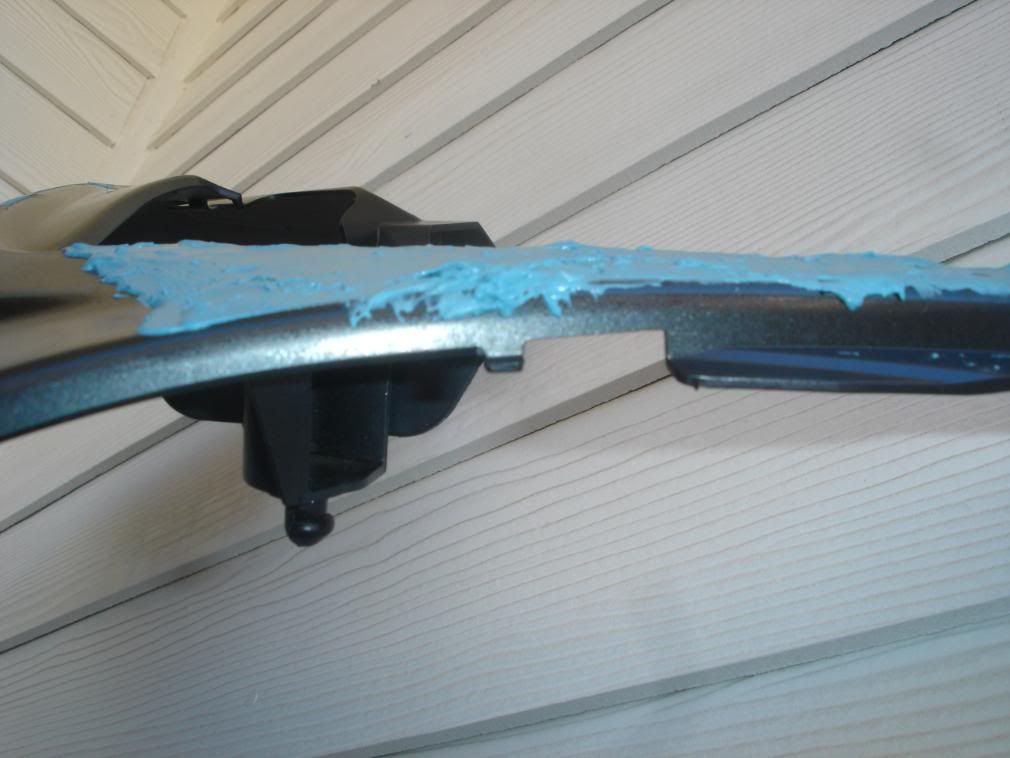
I've started the proccess and i am now awaiting for the filler to dry. (I kind of caked the gouge rather than put a thin layer) I put some pictures to show the proccess. Tell me what you guys think and if everything looks good. Thanks.


Sanding went well
fairingproccess001.jpg

fairingproccess003.jpg


First coat of BullDog "PAP" :thumbup
fairingproccess009.jpg

fairingproccess011.jpg

fairingproccess010.jpg

fairingproccess015.jpg


first layer of filler.
fairingproccess016.jpg

fairingproccess017.jpg

fairingproccess021.jpg
 
Damn the firewall!! I can't see the pics until I get home so I can't tell how you did the "gouge" job.

just in case, if you create a "sandwich" with the plastic in the middle and the filler on both sides it creates a more solid piece.

As far as drying time, it is always better to wait, especially if you laid it on really thick. Your gonna have a much easier time prepping it when it is properly cured.

Congrats on the progress so far, can't wait to check out the pics after class.
Oz
 
Back
Top