• There has been a recent cluster of spammers accessing BARFer accounts and posting spam. To safeguard your account, please consider changing your password. It would be even better to take the additional step of enabling 2 Factor Authentication (2FA) on your BARF account. Read more here.

GS500 build thread... cf tanks, internal supercharger, etc

mllcb42

New member
Joined
May 3, 2010
Location
Lancaster, Ca
Moto(s)
Aprilia Mana
Benelli TNT
So I've got a build going for my senior engineering project. Had a thread going on a couple other boards, so figured I'd copy it over here for you all to look at.
These posts go back to about march.

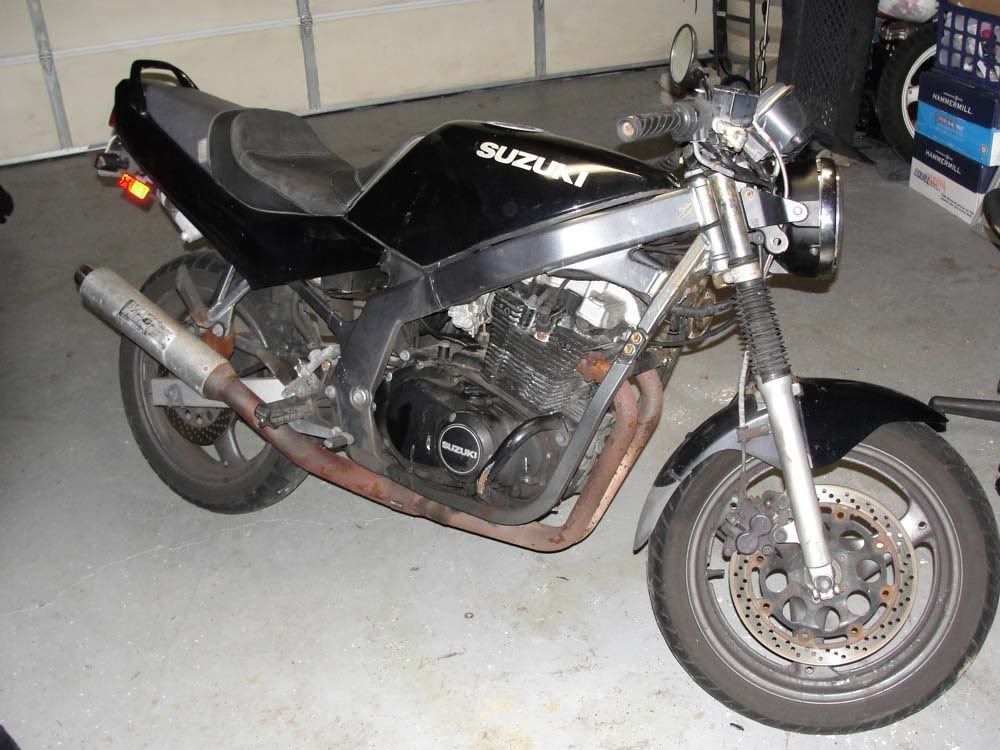
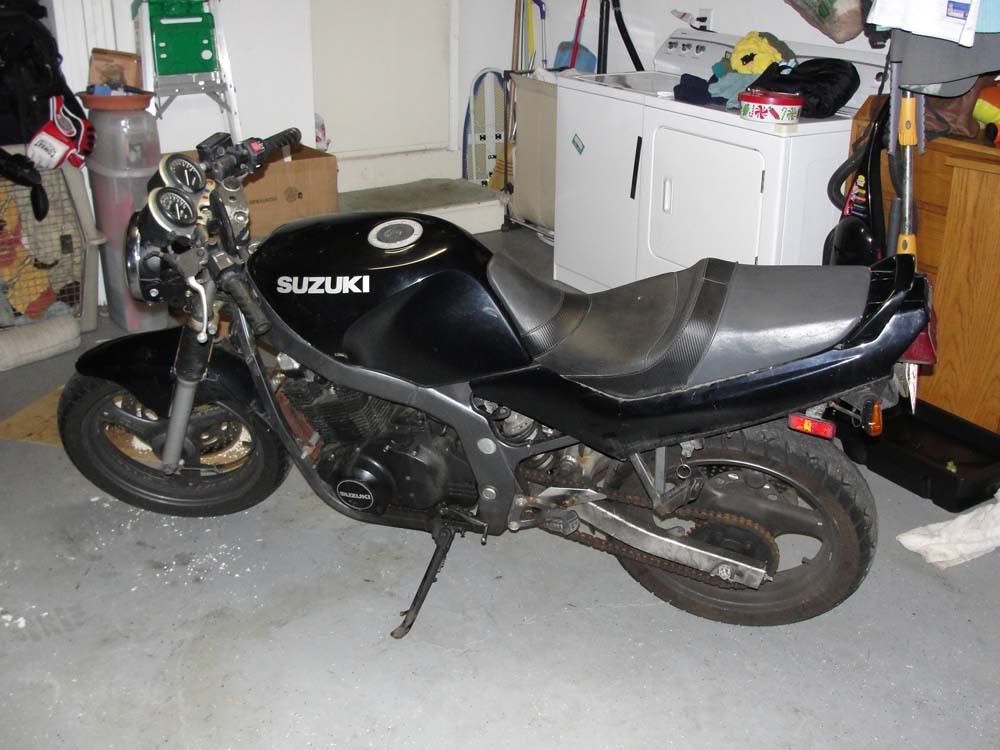
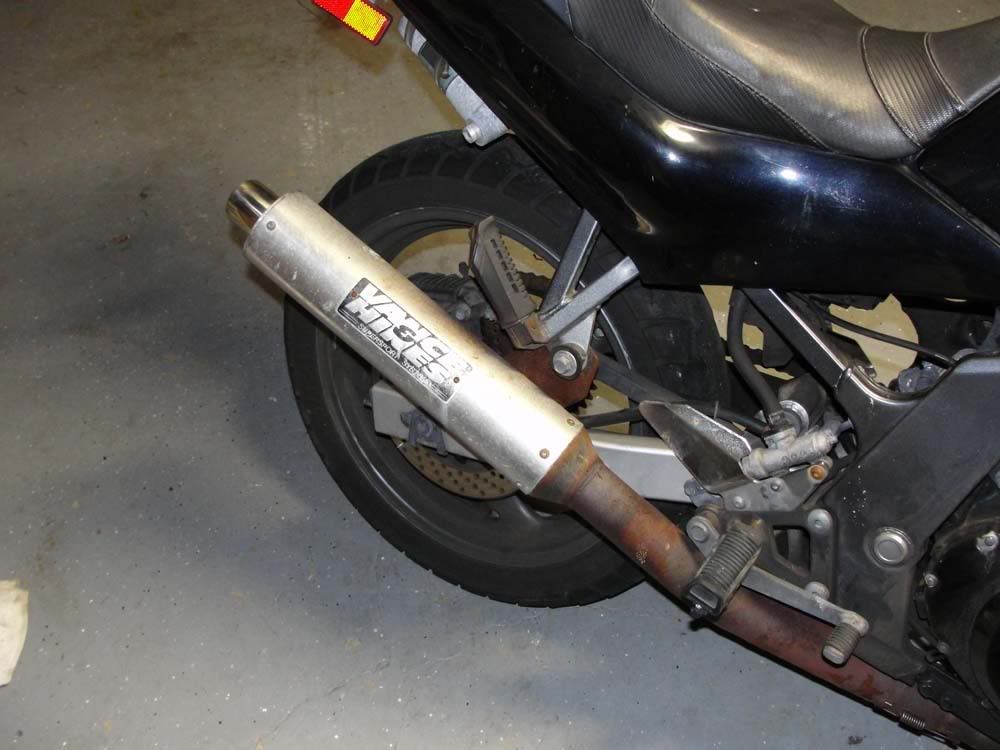
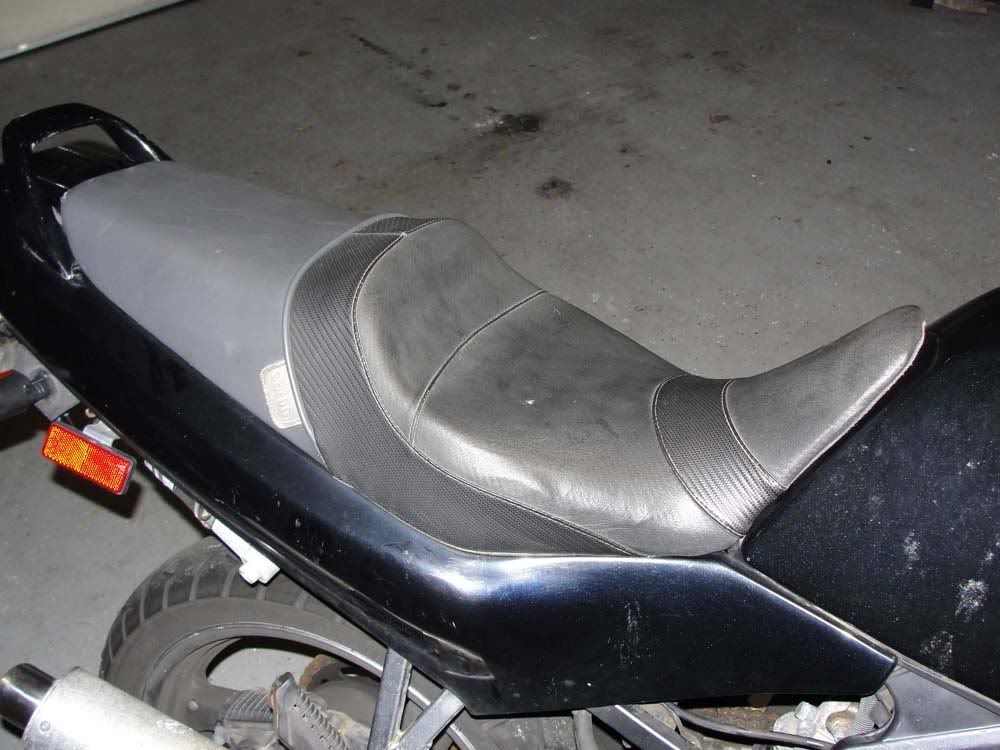
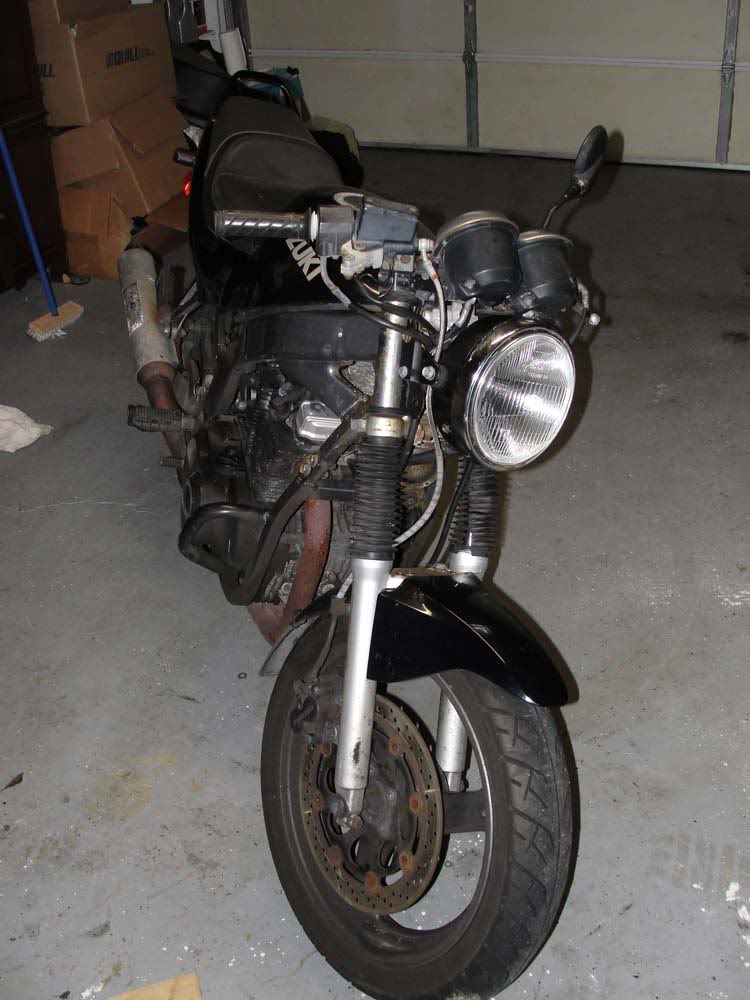
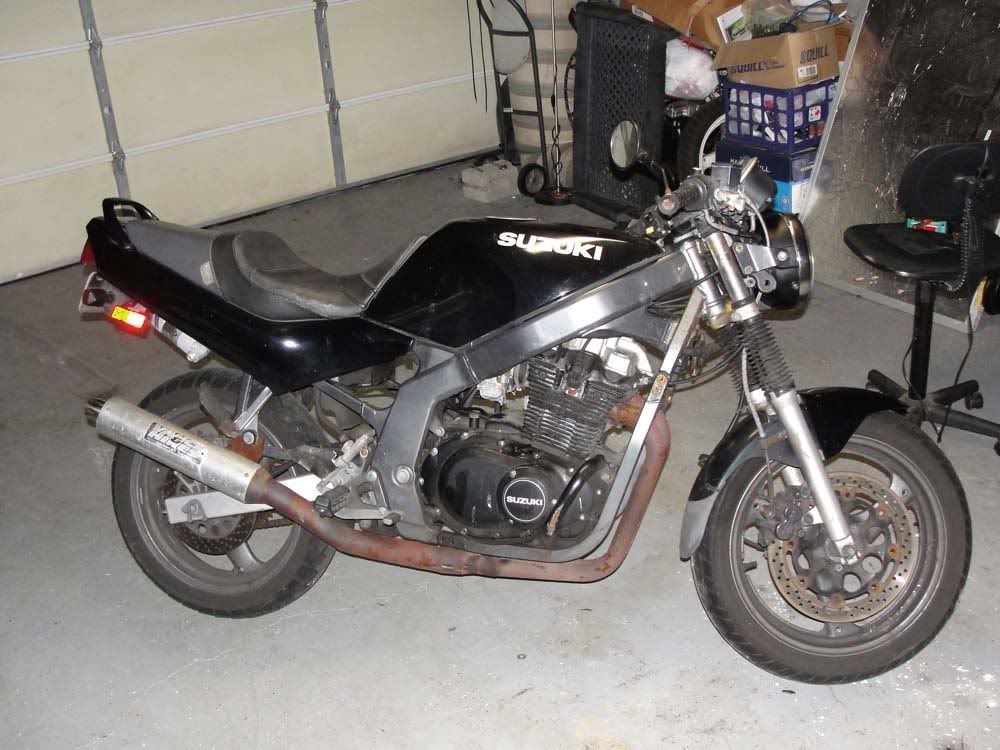
Picked up the bike today. $400 for a 96 GS. Has a corbin seat, vance and hines exhaust, and clip ons.

Needs a new tire, the carbs rebuilt, new brake lever, and possibly a new battery(charging it right now to see if it needs replaced).

gs5001.jpg

gs5002.jpg

gs5003.jpg

gs5004.jpg

gs5005.jpg

gs5006.jpg
 
Spent a while this weekend working on getting the garage all set up so that I could have a good designated work area. Thanks to craigslist, a new workbench has found its way to the garage for the huge price of free. Got the extra motor up on the bench with the reed valve and carbs to start getting an idea exactly where things are going to go.

dsc00074-e1270361031839.jpg

dsc00064-e1270361006603.jpg

dsc00065-e1270360979687.jpg


For the compressor design, reed valves are going to be used. They seem to fit perfectly on the exhaust side with how the polaris boot is designed. Almost like it was meant to be.
dsc00066-e1270360956355.jpg


I will have to verify on the bike for frame clearance before machining the halve housings(probably next week over spring break).

On the intake side, the valve will be replacing one of the carbs. Should fit nicely, as it's about the same size as one of the carbs.
dsc00072-e1270360929137.jpg


On the carb note, it looks like the left cylinder will be the one becoming the compressor, as the right carb has all the controls on it. The carbs are set up so the right one has the throttle hooked up to it, etc, and via levers and such, controls the left one. Makes it much easier to ditch the left carb than the right carb, and as the bike is pretty much symmetrical, there shouldn't be any other issues.
dsc00073-e1270360906721.jpg


I still haven't decided if I'm going to even stay with a carb set up, but I'll certainly plan for the option there, as doing a fuel injection system would require the same work, left or right.

To finish off the compressor, I'll need to get rid of the stock valves.
dsc00068-e1270360880872.jpg


I may be able to remove just the valve itself, and leave all of the springs and such in place. After taking the valve cover off the motor, the valve channels seem to be sealed up nice and tight, so it would make life really easy if the valve train would still operate with the valve itself removed.

dsc00069-e1270360847447.jpg


In addition to this work, I installed new tires on the bike, along with new brake pads. Now just to rejet the carbs(parts are in the mail) and it'll be ready to ride to start getting some baseline fuel economy figures.
 
Bit of an update. Finished the valve housings today. Conversion of one of the cylinders to a pump is about 90% there.

since everyone loves pictures


How the design started
valve-housing-design.jpg


Milled from 4"x4"x3" 6061 billets
progress-valve-housing.jpg


Almost finished product
finished-valve-housing-2.jpg

finished-valve-housing.jpg


Got the new valve housings all bolted up, and the old valves removed.

I really need to do some cleaning to get all that built up gunk out of there.

dsc00158.jpg

dsc00161.jpg

dsc00160.jpg

dsc00164.jpg

dsc00162.jpg
 
Solved the issue with the stock valves today. Replaced the valves with a bolt with o-rings on each side and a lock nut to securely hold it in place. Should seal things off nicely. Managed to clean the combustion chamber up a bit too. Lots of carb cleaner and scrubbing with a wire brush. Tomorrow I’ll torque everything down, get the cams properly aligned and the motor will be ready for testing.

Everything all cleaned up
dsc00165.jpg


Where the valves were that needs to be sealed.
dsc00168.jpg


Replacement for the valves to seal everything up
dsc00170.jpg


Valves all sealed up
dsc00171.jpg

dsc00172.jpg
 
Time for a bit of theory. Ideal air flow through a reciprocating pump, in this case an engine, can be calculated based as m dot(mass air flow)=pDN/120 for a 4 stroke motor, where p is air density, D is displacement, and N is rpm. For a motor that intakes air with every rotation, instead of every other, this becomes mdot=pDN/60. Long story short, if it can be shown that the valves on the motor are opening twice as often on the compressor side as on the combustion side, the motor should flow twice as much air.

The motor was displayed yesterday to show proof of concept as an internal supercharger. For this demonstration, the starter motor was hooked up to a 12V battery and allowed to crank the motor over. Through observation, one can see that the valves are indeed operating as designed, with the compressor valves opening on every crank rotation and the untouched cylinder opening on every other. This is far from running, but shows proof of concept. The valve movement on the reed valves is a bit difficult to see, as not much air is flowing with just the starter going, but close observation makes it visible.

http://www.youtube.com/watch?v=I-aw8V151_M

In addition, I picked up an 06 GSXR-600 front suspension today that will make its way onto the bike to update the antiquated brakes and suspension. One fork is a bit bent, so I'll pull them both and take them to either have that one straightened and the other one checked, or replace them with a straight set, but will work great at updating the front end.

Here's the front end I picked up:

dsc00191.jpg


Been starting to work on roughing out the fuel system for the bike. Torn between developing my own fuel injection using a microprocessor board I build and using something already out there like megasquirt. If I do megasquirt, I'll probably still have to build a small microprocessor board to do all the boost controls for me, although it may have some built in PID control options I can make work. We'll see.

Torn between making my own intake manifold/throttle bodies and just stealing something off a gsxr or an r6. Running boost, I'd like to be able to run a map sensor for better tuning, but doing this on an itb set up is a bit difficult. Perhaps I'll make a small intake plenum.

Also, fuel injection means I need a tank with a fuel pump in it. I can either take a stock tank and try to find room for a fuel tank, or more likely I'll make my own tank from scratch.

This weekend I'm going to try to finalize the design for the rear sets I'll be making so I can start churning them out. Should bring in some income to help fund the project. Going to try to get the fork straightened this weekend as well and see if the front wheel I have is salvageable. Next week I'll try to finalize what I'm going to do about the fuel injection and start on the design for the tank.


This is certainly turning into one hell of a frankenbike
 
The megasquirt stuff showed up today. Have a bunch of soldering to do, but I now have an ecu for running fuel injection/controlling ignition timing.
dsc00213.jpg


Spent a good 6 hours with a soldering iron today, but just about finished the ecu for the bike.


Megasquirt ecu and relay board
When I started:
dsc00214a.jpg


finishedish:
dsc00216a.jpg

dsc00217a.jpg


few things will have to be added once I decide on some specifics of some of the sensors I'm using and make some choices about how I want to do ignition, etc, but otherwise done.
 
While progress continues on the fuel system (throttle bodies have shown up and I’ve started to modify them, etc), I tackled another little side project. Part of what I wanted to do with this bike is update it as a whole, so I’ve decided to replace the brakes and suspension of the bike. Silly to have a modern engine system with brakes and suspension a quarter of a century out of date. Next week, I’ll be posting up about the front suspension/brakes which are being replaced with a complete front end from an 06-07 Suzuki gsxr 600, but for now, here’s an update on the rear suspension.

Enter R6 rear shock.
2010-06-19-12-39-56.jpg


Bolted right up. No issues with needing to grind the swingarm or anything.

dsc00218a.jpg

dsc00219a.jpg

dsc00220a.jpg


Interestingly, it seems the previous owner of the bike had swapped in one of the older GSXR shocks with the remote reservoir.
dsc00221a.jpg
 
I haven't yet figured out if a supercharged 250 is gonna be somehow better than a 500, but I'm intrigued by the concept.

Subscribed. :nerd
 
i unzipped my pants to the potential of this thread.

keep up the good work!!!!
 
Been a bit busy since the last post. As promised, albeit a few days late, I've tackled the front suspension. For the front suspension, something a bit more modern was wanted. A supersport inverted fork layout was selected, for increased performance in steering and braking and for the aesthetic upgrade. From the factory, the GS500 comes with a very underwhelming front end, especially for anyone over about 140 lbs. In its stock form, an upgrade is a huge improvement, so when modifications are being done to up power output, suspension and brakes ought not be overlooked. Thanks to the wonders of craigslist, I was able to pick up a front suspension off a wrecked '06 Suzuki GSX-R600. I was told by the seller that one fork was slightly bent, but everything else was in great shape. The front wheel, however, was a total loss. I paid a great price for this condition. Unfortunately, after further inspection, this description was a bit of an understatement. The guys at G P frame in Napa, Ca did a wonderful job getting the front end all sorted out. Both forks needed lots of work, along with the upper and lower triple trees and the axle. Far from the one fork needing slight adjustment I had expected. After a hole in my wallet, I was left with a great front end to use.

Unfortunately, the front wheel that came on the front end was not salvageable, despite the efforts by G P frame. I ended up picking up a 98 GSXR 600 front wheel off ebay for a great price. About 1/4 of what an 06-07 GSXR wheel would cost. Unfortunately, these are not a direct bolt up. The brake rotors that came with the front end would not bolt up to the older gsxr wheel. Instead, I picked up a set of Hayabusa brake rotors. They bolt up the wheel, but weren't a direct fit to the brake calipers. More on that in a bit.

Now the GS500 is a much smaller, less expensive bike than the supersports, and as such have a much smaller, weaker suspension set up. The GSXR front end does not bolt up to the GS500 frame. To solve this, I went to Bob Broussard, an experienced GS500 builder who has done this front suspension swap many times. The GS500 stem was pressed out of the GS lower triple, welded to add some material, then shaped and pressed into the GSXR lower triple. This allows the lower triple to mate to the GS500 frame, however, the top GSXR triple tree needed an adapter to be made. I had to modify the frame slightly to use the GSXR ignition module, just for clearance. A new steering stop will need to be made and welded to the GS frame, however, I haven't tackled this yet. This new steering stop will also act as a point from the GSXR steering damper to bolt to.

After adapting the front suspension to the frame, attention was turned to the wheel and brake issues. The 06 GSXR axle fit the older wheel great, however the spacer used to center the wheel was too large, causing the wheel to sit off center and rub. About 5mm was removed from the surface that meets the wheel on the spacer, centering it while mounted. The brake rotors sit about 2mm further apart than the older ones, however, play in the brake calipers will easily make up for this. The calipers, however, did need to be spaced out to clear the larger 320mm diameter Hayabusa rotors over the 310mm GSXR rotors. Honda sells a caliper spacer that would have achieved this goal, however, all the local dealers were out of stock and it offered a good excuse to practice my lathe skills and save $25. I picked up some 1" diameter aluminum bar stock, and turned a set of spacers for the calipers.

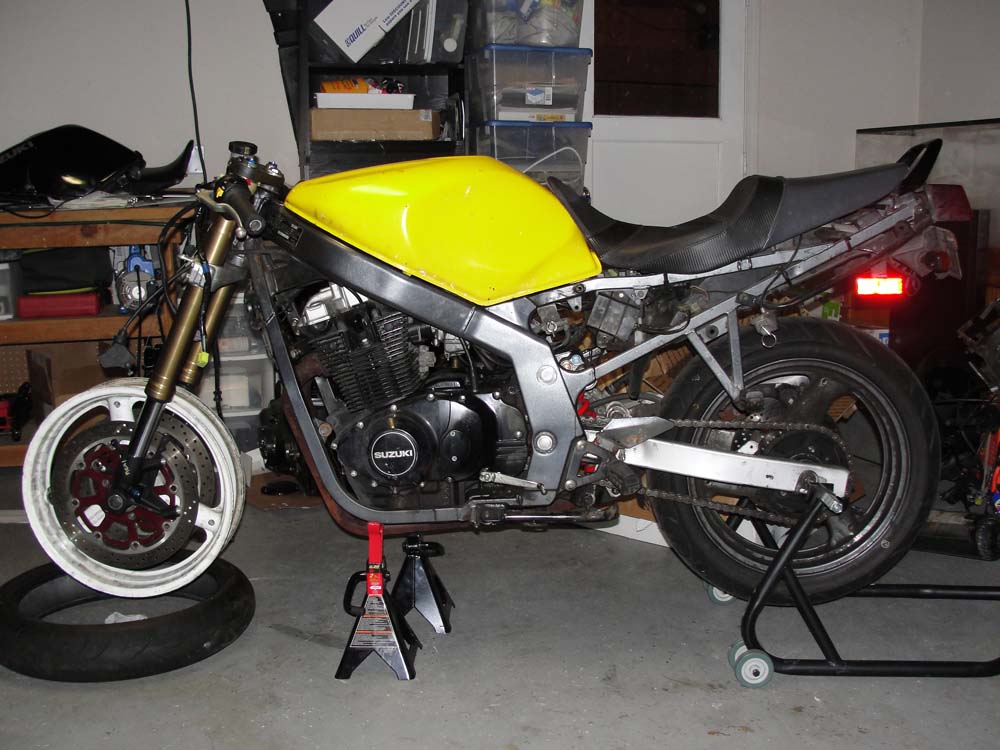
The new, updated hand controls require some serious rewiring. As I am converting to fuel injection concurrently, significant wiring needs to be down there as well. As such, I removed the stock wiring harness from the bike, and used the opportunity to start cleaning things up. Some serious modifications to the frame were completed as well. As I will be running a solo seat, an abbreviated tail for aesthetic reasons, and a under bike mounted exhaust, I ground off the passenger pegs, exhaust hanger, and a section of the rear frame. Also painted the front wheel while it was without a tire. Now onto the pictures:

dsc00225a.jpg

Before cutting and with the stock front end.

dsc00228a.jpg

Stock front suspension

dsc00253a.jpg

Comparison between the old and new front forks. Note that the GS stem has already been pressed into the GSXR triple tree

dsc00257a.jpg

With the GS stem, everything bolts up to the frame like stock

dsc00272a.jpg

The aluminum adapter made to fit the GSXR top triple tree and the steering lock ground down for clearance of the GSXR ignition module

dsc00264a.jpg

Mock up with the new controls in place, older wheel, etc

dsc00291a.jpg

Calipers mounted up with the 5mm spacers I made in place

dsc00269a.jpg

Profile with the new front end

dsc00277a.jpg

Stripped down, waiting to go under the knife
 
Haven’t posted up in a while. Moved to a new house and in the process, misplaced my camera cord. Was hoping to wait until I had some quality photos to post, but one off my cell phone will have to do.

As part of the fuel injection system on the bike, a fuel pump is needed. Unfortunately, a gas tank for the GS500 that accepts a fuel tank does not exist. As such, I must make one. What I’m doing is taking the stock gas tank from the current generation GS500 and working off that. I stripped a tank down and used it to make fiberglass molds of the tank. From that, I’ve made a fiberglass replica of the tank, which is then shaped to accept the fuel tank and any other modifications I deem fit. From there, another set of molds are pulled and then the tank is finally made out of carbon fiber and kevlar.

Here is my fiberglass plug, ready to start modifying, fresh out of the fiberglass molds.
2010-09-30-20-15-231.jpg


Making progress on the gas tank. Painted blue briefly to make the shaping a bit easier. The final molds aren't too far on the horizon. Then it's cf/kevlar time. Going to leave it floating a bit so that all the hybrid components are visible on the intake side of the motor.
p1010206trim.jpg

p1010210trim.jpg
 
Tank is almost ready to go though. Hopefully this weekend it'll be time to start pulling molds off of it.

Everywhere that is blue still needs to come down and be surfaced, and I've started a final skim coat. Then primer and final surfacing.
p1010214small.jpg

p1010215small.jpg
 
Today's progress....

shaping is like 95% finished... now fun with surfacing and getting everything perfectly smooth. The carbon parts will have the same surface finish the plug I pull the final molds from does, so this will end up getting smoothed out with up to 2000 grit paper, then buffed and waxed before I pull molds.

dsc00373trim.jpg

dsc00374trim.jpg

dsc00375trim.jpg


Here's all the work on the bottom of the tank compared to a tank bottom straight out of the first mold. The sides were brought WAY down so it's nearly flush across the bottom, major flattening was done near the back of the tank to allow for mounts for the fuel pump to be attached in and the overall tank bottom has been smoothed to make it easier to lay up.

dsc00376trim.jpg
 
After WAY too many hours of sanding...
p1010212trim.jpg


About ready to start pulling molds.

First mold piece. Needs trimmed and cleaned still.
p1010217trim.jpg
 
Bottom mold is out, cleaned up, and ready to go

bottommoldtrim.jpg


Started working on the top half.

A layer of plaster goes down and is allowed to dry. When I pull it off, it's perfectly shaped to the contour of the tank. I can then trace that onto a piece of wood and cut out the piece that will act as a parting line between the two halves of the top mold.
partlinetrim.jpg


Also, gas cap showed up from Hong Kong today. Not bad for $20.

gascaptrim.jpg


tankwcaptrim.jpg


tophalfmoldtrim.jpg


molds are coming along nicely


Today's work meant popping off the two top halves of my molds.

Before popping
topmoldstrim.jpg


Fresh off the plug. Came out beautifully
onetoptrim.jpg


All three molds fresh from the plug, almost ready to lay up carbon
threemoldstrim.jpg
 
And this is how we make the bottom of a tank...

bottomlayup.jpg


Going to get 4 layers of 2x2 twill carbon, cut at 60 degree angles for maximum strength. Extra layer of carbon added where the mounts will go, and a layer of unidirectional carbon where the fuel pump will mount for a little extra strength.

Everything gets laid up on the mold, then a layer of peel ply added on top, followed by the red mesh to allow channels for air flow, then a cheap towel on top to soak up any extra resin.

Everything in the bag under vacuum...

bottominbag.jpg


The bottom of the tank should weigh in at under 200 grams.

Fresh from the mold

moldbottom.jpg


Trimmed up

carbonbottom.jpg
 
Wasn't happy with how the bottom of the tank turned out. It had some wrinkles in it that would cause problems when I join the tank halves...

so I made another one
newbottom.jpg


New one on the right... used a different weave carbon, and added a layer of fiberglass to the top and bottom so there's no chance of reaction between the cf and the aluminum in the fuel pump. Just being overly cautious.


Also, worked on the throttle bodies for while. This is mocked up using an 01-03 gsxr 600 throttle body. I have a set of sv650 throttle bodies in the mail as well. We'll see if they work better.

fimockup.jpg


SV650 throttle bodies showed up today. Now I get to disassemble, and find a way to make two into one... i.e. the sensors from each on only one throttle body.

These are way nicer than the gsxr units I was going to use, and have all the sensors I though I was going to have to fabricate mounts and such for, etc.

WAY larger too... which means they won't bolt up quite as easily, but that's ok, I'll just mill out some adapter plates.
 
My christmas present, ready to open this morning
tankinbag.jpg


Had to fight with the damn thing for an hour to get the tank out... but when I did...

Fresh from the mold
tankfront.jpg

tankback.jpg

tank3quarter.jpg

kevlarlining.jpg

Kevlar lined

And the money shot:
cftankonbike.jpg


Now with more gas cap

bike1.jpg

bike3.jpg

bikefront.jpg
 
I originally purchases a set of throttle bodies from a GSXR600 to use for this project. I paid next to nothing for them because of some damage they had suffered. Unfortunately, the lacked some key components as well; most importantly, a fast idle valve, used to control the idle and air flow to the motor during warm up. After working with them for some time, I decided to go another route, and picked up a set of throttle bodies from an 03+ Suzuki SV650S. These throttle bodies are much larger in size, so there should be no question about them supporting the motor, they include all of the sensors I could need, and are better set up for running as individuals.
p1010213.jpg


Unfortunately, there are 2 throttle bodies here, with the sensors and valves needed split between them. For the bike, I need one throttle body that has the throttle plate to attach to the hand controls, the throttle position sensor, and the fast idle valve. To do this, I’ve taken the throttle body with the tps sensor attached, removed the throttle plate from the gsxr600 throttle bodies I was going to use, and modified it to work.

Here is the SV650 throttle body(left) next to the much smaller gsxr600 throttle body(right), with this modification already finished.
sidebysidethrottle.jpg


The fast idle valve will attach to the left side of the SV650 throttle body. To do this, I just need to drill out and tap two holes, create some spacers on the lathe, and bolt it up. An adapter plate to mount the throttle body to the motor will also be needed, however, none of this is a significant undertaking. Between this and the nearly finished gas tank, the fuel and ignition system for the bike is almost finished.


but....
the second generation sv650 intake manifold boots happen to bolt right up to my GS motor... Going to save me a bit of machining.

throttlebody.jpg

throttlebody2.jpg


Much better with the new throttle body
 
Back
Top