• There has been a recent cluster of spammers accessing BARFer accounts and posting spam. To safeguard your account, please consider changing your password. It would be even better to take the additional step of enabling 2 Factor Authentication (2FA) on your BARF account. Read more here.

How to paint a motorcycle without a compressor & spray gun

painting aluminum

Reckon,

Most of the pieces that I need to paint right now are aluminum, and mostly cast.
I've got the aluminum prep of the parts down:
1- glass bead blast
2- scrub out very thoroughly with soapy water / or boil the part if it's an engine case
3- Submerge in 140 degree alumiprep solution. Or scrub out with alumiprep if I can't submerse the part.

Now I've got a spanking clean aluminum part, such as final drive casing, top triple clamp etc (these are the parts that I'm not anodizing).

I've been doing massive research on painting aluminum and still am having a hard time figuring out if I can get decent results that last, using an epoxy primer with urethane topcoat. (I haven't dropped the massive money yet for the high end products pre-treatment / multi-stage primer products).

I've read up on MILSPEC aircraft aluminum treatments and they are more than a 5 step process using expensive treatments.

Any suggestions on a quality method of painting aluminum that won't break the bank?

I'll be doing my engine cases soon and like you said in your previous post, I don't want a many layer, thick coating on the engine. Figured I could get away with a similar quick solution on my other parts...

Please advise! Thanks for taking the time with all your recent posts BTW.
cheers,
-Stephen

first off,...I'd suggest powder coating (that's the easiest way out),......

ok but if you have your heart set on painting the bare aluminum, but you are over thinking it (hey! I do that too!)
the thing to keep in mind when painting aluminum, is that corrosion starts in MINUTES after cleaning, so you need to get it clean(MEK, thinner), then QUICKLY use a phosphoric acid solution (standard "metal prep"@ any hardware store) to impede corrosion, and to facilitate the epoxy sticking, then shoot the epoxy and keep it THIN.

TIP: after the metal prep dries, it'll lave a powdery substance behind,....... that's ZINC PHOSPHATE, and you WANT that, but not so much that the epoxy won't absorb into the powder, so take a clean dry paper towel, and spray a SMALL amount of windex on the towel (NOT the surface), just to make it slightly damp, and gently wipe the paint-able surfaces down to remove 50% of the powdery zinc phosphate,.....then let it all dry out for several hours, then shoot the epoxy (or acid etch primer, for the compressor-less version)

then shoot your color, and clearcoats, or single stage, engine enamel, etc,.....just again KEEP IT THIN, as the thicker the coating gets, the more easily it'll chip later on.

then let everything cure out for a few days, and install and run.

but again, the EASIEST way, is just to drop it off at the powder coaters. :thumbup
 
Last edited:
Reckon,
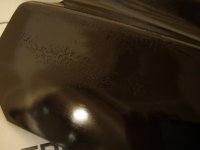
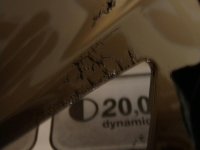
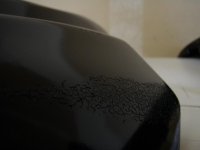
So i finished a piece that had orange peel. And i wasn't satisfied so i knocked down the clear with 2000 Grit wet. I then wanted to add another coat of paint because i saw that i damaged the base coat.

So i scuffed the paint with 1000 grit and shot a coat of base. And the result was the paint seemed to have risen and cracked almost like skin peeling.

What went wrong? (see pictures)
P2180002.jpg

P2180003.jpg

P2180004.jpg
 
that's called "lifting"and it means the previous coat WAS NOT CURED YET,...so the solvents in the newer paint actually reactivate the still soft primer and basecoats and the result is the top coat wrinkles.

it also means the primer used was not the best quality, because good quality $15 a can primer will NOT do that, even if you push it.

let it sit for a couple of weeks, THEN scuff it really well all over with 400 wet, get ALL that "crackle" pattern OFF, and yes you will probably end up sanding down to bare plastic to do that,.....then you basically start over: prime, sand, then shoot the first few coats of base LIGHTLY: shoot a mist coat and let it dry for a half hour, then shoot another mist coat,..wait another half hour then shoot a decent coat of base, and pray it doesn't lift again,...then I'd wait a full week before topping with clear,...and obviously you need to wait a MONTH at least (45 days is better) ESPECIALLY in this cold moist weather before sanding and polishing OR re-shooting any part of the job,......remember GOOD painters are CONSTANTLY aware of environmental changes, and adjust the plan accordingly.

when you use standard rattlecan paints (like color rite, or dupli-color) what you save in cash, you certainly lose in time: it just takes 30 to 45 days for STANDARD rattle can paint to cure enough to work with,....the high quality stuff in the above post can be re-shot or polished out the next day.

live and learn,.....I've done the exact same thing before, and got the exact same result,........it happens when you rush, and try to do this on the cheap.
 
Reckon,
Do you absolutely have to sand the high build primer? What ill effects does this have if you don't sand the high build? I'm painting some small parts and properly sanding is next to impossible...

Please elaborate.

Thanks!
-S
 
Reckon,
Do you absolutely have to sand the high build primer? What ill effects does this have if you don't sand the high build? I'm painting some small parts and properly sanding is next to impossible...

Please elaborate.

Thanks!
-S

your paint will fall off! high build primer MUST be sanded for proper adhesion.

so on those areas where you can't sand, you just use the etch primer, and skip the high build.

I would also probably use a skim coat of BULLDOG spray, which is usually used as a plastic adhesion promoter, but you can also use it as whats called a "tie coat", that is, a coat of sticky adhesion promoter so your paint has something you don't need to sand to stick to, and in a rattle can, that's about your only choice.

but really, you just take tiny pieces of sandpaper, or one of those sanding sponges, or just roll a sandpaper "doobie" and you'd be surprised at what you can get at sanding.
 
Materials and Costs to paint a standard 7-piece Sportbike.

- Adhesion Promoter.....1 cans. $24.24. Bulldog. (KLE ETP0123B)
- High Etch Primer......1 cans. $15.65. U-Pol #8 Acid Etch Primer. (UPO 741)
- High Build Primer...2-3 cans. $15.44. U-Pol #5 High Build Primer. (UPO 763)
- Guide Coat............1 cans. .$8.53. U-Pol Guide Coat(UPO 2043)
- Base Coat...........3-4 cans. .$5.04. U-Pol Power Can - Gloss Black (UPO 803)
- Clear Coat..........4-6 cans. $15.15. U-Pol #1 Clear Coat (UPO 796)

Total: $205.80 + $30.19 shipping to CA + $15.95 tax.
Total: $251.94
* Calculation of total used highest number of cans (3 high build primer, 4 basecoat, 6 clear coat). Prices as of 3/1/2009.

Prices and product codes are from http://www.tcpglobal.com.

I used the number of cans specified in this thread and one of Rekon's older thread.
The numbers are estimates and might be slightly off.

compared to:
Reducer=galon=$25
Sealer+hardener=quart=$70
High Build Primer+activator=quart=$50
Basecoat=quart=$100
Clearcoat+activator=quart=$80
---------------------------------------------------------------------------------
Total=$325
+compressor rental=$50 a day, plus $500 deposit (cc card ok)

DECENT spray gun=$50-$250
hoses, in line water traps, fittings, etc= $200
----------------------------------------------------------------------------------
Approx. total out of pocket cost:
$600
(not including the refundable comp deposit)

so it might seem like alot when you compare it to el cheepo rattle cans, BUT you get truly professional results, and a paint job that LASTS for YEARS, instead of weeks.

thanks for taking the time to post that, it really helps put all this into perspective :thumbup
 
Last edited:
ALSA paints

Thanx for the article. I am going to try this process on my bike, but I have a couple of questions.
1. Have you ever used Alsa killer cans? I am told these are the best.
2. For priming, do I have to use an etch primer or can I go stright tgh build primer?
3. For primers again, you talk about the U-POL primers, but what is a good SEM primer? My local dealer only sells the SEM products.

Oletyrone
 
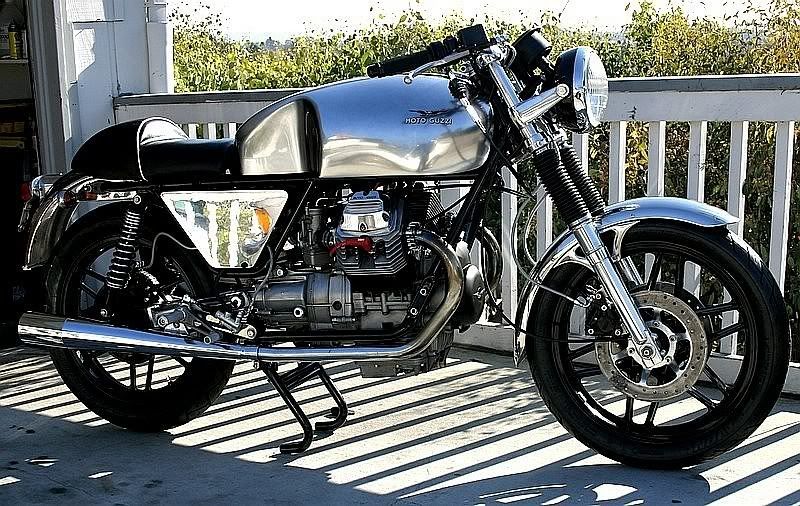
I have only used the chrome paint, and it was a pint of the stuff, not the newer spray cans:
guzzi11.jpg


thats a fiberglass tank, btw, NOT aluminum ( I know, cool huh?)

ALSA seems to have a decent clear (they say "2K", but I see no red button, like on the spraymax clear?), and some nice "effect" colors, but no primers that I see, but I know their stuff is top quality though, so I'd feel safe ordering it.

SEM makes all the same stuff, just a slightly lower quality grade than U-Pol, and probably not as good as those ALSA spray cans either, but it'll work,.....use the same products, etch, high build, plastic adhesion promoter, etc,...

the ETCH primer, grips the surface you spray it on with acid etching action (millions of microscopic "sanding marks"), so it REALLY helps with the chipping later on,...you can choose to omit the etch step if you like, BUT your paint job wont last anywhere near as long.

it's kinda like the foundation to a house: build a crappy foundation, and you get a crappy house, so I'd use the etch, but thats me.
 
Last edited:
Reckon, great job writing up a difficult topic. One quick question, is the list posted by mike23w all the materials I would need to paint (obviously changing colors to suit my needs)? I hate to ask for a shopping list, but I think it would suck more to get halfway done with my practice piece then realize I was missing something crucial. As for a practice piece, I think Im gonna use my helmet. That way if it turns out good it will match. Also, what is the best way to remove paint from the fairings? Thanks in advance.

Here is what I just bought today:
1 SEM 15083 - SEM VINYL COLOR COAT SILVER $11.26
3 UPO 791 - HB#5 GRAY SPRAY PRIMER $46.32
1 KLE ETP0123B - BULLDOG PAINT ADHERE 15oz $24.24
1 UPO 741 - ACID ETCH #8 PRIMER $15.65
1 UPO 2043 - GUIDE COAT $8.53
2 SEM 15163 - PRESIDIO SPRAY $22.52
2 SEM 15053 - SEM VINYL COATING GRANITE $22.52
5 UPO 796 - CLEAR #1 CLEAR COAT $75.75
1 KUS KB-HR - 9" HALF ROUND SANDING STICK $19.96
1 KUS CMF1830 - 18" x 30' CLEAR MASKING FILM $24.95
Shipping & Handling (UPS GROUND) : $40.68
Tax (AR) : $0.00
Total: $312.38
 
Last edited:
Reckon, great job writing up a difficult topic. One quick question, is the list posted by mike23w all the materials I would need to paint (obviously changing colors to suit my needs)?

Rekon's the man so he should answer this...

But from his article you may want a paint suit and respirator.
And maybe materials to repair fairings/plastics.

I reformatted Rekon's excellent post and put it up in the Test Forum:
Reformatted paint article

I didn't change any of the content just structured it differently. I put each section into it's own "block" or paragraph for easy scanning.

Rekon,
Hope you don't mind my reformatting the article. I tried to attribute it to you and make very clear it's all your work and effort. Plus I posted in the test section so it would be discrete. If you want me to take it down, please send a PM me. I actually spent quite a bit of time formatting the article; but considering the amazing information that you provided I think it was worth the effort (for me at least since I learned a lot). Also, I think (but am not positive) after a few weeks the posts in the Test Forum will automatically be purged and deleted.
 

Attachments

  • rekon.txt
    31.8 KB · Views: 365
Last edited:
Rekon's the man so he should answer this...

But from his article you may want a paint suit and respirator.
And maybe materials to repair fairings/plastics.

I reformatted Rekon's excellent post and put it up in the Test Forum:
Reformatted paint article

I didn't change any of the content just structured it differently. I put each section into it's own "block" or paragraph for easy scanning.

Rekon,
Hope you don't mind my reformatting the article. I tried to attribute it to you and make very clear it's all your work and effort. Plus I posted in the test section so it would be discrete. If you want me to take it down, please send a PM me. I actually spent quite a bit of time formatting the article; but considering the amazing information that you provided I think it was worth the effort (for me at least since I learned a lot). Also, I think (but am not positive) after a few weeks the posts in the Test Forum will automatically be purged and deleted.

not at ALL,......great job,...and it needed it,.....

I'm going to re-post your version, giving you credit for the editing (if you dont mind)

:thumbup
 
Reckon,
Any experience with crinkle paint? I'm thinking about putting some on the lower part of my tank, where my legs will rub. How does it hold up? Is it possible to use some kind of clear coat over it? Thanks
 
Clear coats

Do you have any tips on how to get a nice even clear coat? Is it better to go all the way across the part I am painting with one continuos stroke (like when you use a spray gun) or strokes that are shorter (like you do with regular spray paint)?
Oletyrone
 
so please forgive my ignorance....i know nothing about painting anything,
but if i were to follow these same steps but using a gun and compressor
would it work? are there any unnecessary steps when using a gun?
also is there anything i should know about using a paint gun that many people dont know?
sorry for the broad questions
 
Happy camper from Utah.

Thanks Reckon, I'm impressed!

Ok I know I'm not from the Bay area, but I just had to leave a comment, I'm currently living in Layton Utah (not native). It was a Phantom Silver color now its a red-orange color.

I followed everything to the T and it came out far better than expected, the only thing however is that the color is from Duplicolor (I know boo) but I wanted a red-orange color, everything else is U-Pol (I think I fell in love with this stuff!) - Clear#1, Acid#8 High build#5 and adhesion promoter for the plastic side covers.
Please ignore the stupid date stamp on the camera, its an old cheap one and doesn't retain the date settings.

Before
0715081223-1.jpg


Now

Picture002.jpg

Picture001.jpg

Picture003.jpg

Picture004.jpg

Hmm, I will need new front tires soon.
Picture005.jpg

Picture006.jpg

Picture008.jpg


Aardvark - VROC Member #27933
2005 Kawasaki Vulcan 1500 Classic.
 
Last edited:
Sorry for not being "clearer." :laughing

The tank didn't need painting, so I painted the fairings using the SEM, but only cleared the red,silver and white so the black matched the matte finish of the tank.

Do you have any problem with it chipping or crazing is gas get's on it. I used the same stuff on my duke and I have those problems. :(
 
Back
Top