• There has been a recent cluster of spammers accessing BARFer accounts and posting spam. To safeguard your account, please consider changing your password. It would be even better to take the additional step of enabling 2 Factor Authentication (2FA) on your BARF account. Read more here.

60's Honda CL 160 Rebuild as Racer

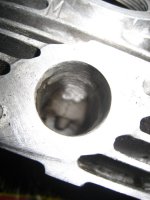
I also drilled out the upper shock mounts. The post on the CL frame is .5" while the holes on the Hagon shocks are 0.4". Strangely Honda was using a mixture of US and metric sizes.

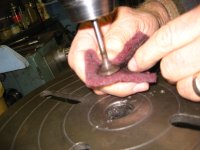
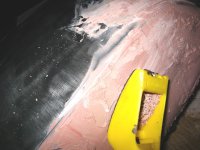
Also put a second skimming of JBW on the fork. This is the CB fork that I'll be running. The other CB fork is in great shape and doesn't need any JB love.
 

Attachments

  • ChainAdjusters.jpg
    ChainAdjusters.jpg
    215.7 KB · Views: 35
  • HagonMounts.jpg
    HagonMounts.jpg
    95.3 KB · Views: 38
  • ForkRepair.jpg
    ForkRepair.jpg
    219.7 KB · Views: 36
Last edited:
Too bad about that rim, but I wonder why keep the chromed steel ones anyway... wouldn't it be beneficial to replace them with aluminum hoops?

I'd love to but that's just not in the budget :|
I'll weight them tomorrow - those steel rims are HEAVY.
 
Which rim is toast? the WM2 1.85 or the WM3 2.15?
I'll check my spares downstairs and see what I have extra, but I think they might all be either too wide or aluminum H sections. no promises.
are you going to try to lace these up yourself?

EDIT:
Actually, I'm forgetting that you are doing this to a CB160 and not a 350, which probably has WM2 stock front and back? I'll look at my spares and my 160 in the morning..
 
Last edited:
Yeah, the front and rear are the same size. I'll be lacing them - the spokes are en route from Thailand right now.

Thanks, I'll look forward to hearing if you've got what I need. :thumbup
 
Thanks for correcting me.

I think the Nisky bike was built for racing, hence the more utilitarian look. If you've seen AHRMA bikes, you'll know most of them are pretty ugly. Function over form. Thos shocks are Works Performance, which are outstanding products. My FT500 roadracer was very fast on a tight track, and I don't think I've ever gone faster at Sears than I did on that thing.

I'd like my finished bike to be more of an AHRMA racer for the street than a stylish cafe-racer to park on the grass of some resort's golf course. But who knows? This might really suck to ride...

Yeah, seen as a racer, I can see where you're coming from. You posted the Ketcham one as your inspiration for the 350 you have in mind, but it sounds like you prefer the look of the Nisky bike? :confused

Any update on your 350? Have you found a bike to work with or are you in the planning stage?
 
Last edited:
Yeah, seen as a racer, I can see where you're coming from. You posted the Ketcham one as your inspiration for the 350 you have in mind, but it sounds like you prefer the look of the Nisky bike? :confused

Any update on your 350? Have you found a bike to work with or are you in the planning stage?

Don't get me wrong: the Ketcham bike is better looking by far, and more the look I'm going after...although what do you think about doing a superbike bar instead of clip-ons? Sort of a hybrid Streetfighter/Cafe bike? I don't know if my back can take clip-ons, especially if I want to do the Moto Melee, which is my eventual goal.

Anyway, here is the status of my project:

Charlie O'Hanlon has a deposit and is setting aside the parts: he says he has everything he needs. He's got a CB400F front end we'll use so I can have a disc brake. I'm going to provide a list of stuff:

-Exhaust from Moto Fiaccone:

motofiaccone6.jpg


-Tail section from Glass From the Past (the same one as on the Ketcham bike)

0023.JPG


-Tires
-Dyna ignition
-Works shocks and fork springs

Paint is going to be matte black at first.
 
Very cool!

I just checked that Moto Melee (http://motomelee.com/) out and wow, sounds like a blast. It's not until June so I've got plenty of time to make it too.

As for superbike bars, the scrambler bars that it came with are essentially motocross bars and I've also got another set of stock ZRX superbike bars that I swapped out for something else. I think the clubmans are going to be my best bet for track riding position, but I'll definitely experiment.
 
Clipons or go home, both of ya :twofinger

I just checked the garage and I don't think I have anything that will help you out.
The only stock chromed style rims I could part with are currently laced up to Water Buffalo 4LS Front (18") and a T500 Rear (19"), which means they are both way to wide for the CB160.

Looks like I also have a alum shoulder Akront that most likely came off a Harley with 40 spoke 2.75x19 rim size, which obviously won't work for you.

I then have some more alum shoulder Takasagos that are all 19s, so they won't work for you either.

Sorry if I got your hopes up, I actually got my hopes up, thinking I could contribute a little bit to your build.
 
Engine Work

I have some friends named Ted and Nancy James. They run an SCCA (Sport Car Club of America - the car equivalent of AFM) car under the name T&N Enterprises. She is the driver, he is the brilliant race engineer. They've been doing it for about 40 years. I think they're probably 70 years old, maybe just under that. Their current car is powered by a 194 HP GSXR1000. Ted took me on as an intern over one summer and since has been a sponsor - providing an invaluable wealth of knowledge. And Nancy has been an invaluable supplier of warmth and home baked goods. :teeth Here are a couple of pics from a test day we did at Sears Point last year. Yup, I'm the umbrella boy. :twofinger

I took a trip down to their place today and Ted and I got most of the engine work done.

First the valves. They were generally nasty. Some were shiny where they made contact with the seats, others were not - indicating they probably weren't making great contact. We cleaned those up. Took a look at the seats as well. They're in generally good condition but could benefit from a lap job.
 

Attachments

  • MeasuringValveSeat.jpg
    MeasuringValveSeat.jpg
    217.6 KB · Views: 36
  • ValveClean.jpg
    ValveClean.jpg
    170.1 KB · Views: 37
  • ExhaustValves.jpg
    ExhaustValves.jpg
    247.3 KB · Views: 36
  • DBA6.jpg
    DBA6.jpg
    44.1 KB · Views: 35
  • DBA.jpg
    DBA.jpg
    64.8 KB · Views: 37
Last edited:
Cylinders

Next came the cylinders. Again in pretty good shape. A small, shallow amount of pitting at the top of one but we smoothed it out to our satisfaction. Because the ball hones were just too big for these tiny cylinders we used a die grinder with this attachment. That's 180 grit aluminum oxide crocus cloth wedged into a shaft with a slit in one end. Worked like magic.
 

Attachments

  • AlOxide.jpg
    AlOxide.jpg
    108.4 KB · Views: 37
  • Cylinder.jpg
    Cylinder.jpg
    94.5 KB · Views: 35
Last edited:
Gaskets

I had a few stubborn gaskets. Ted busted out a very sharp wood chisel and that did the trick for most of it. For the really stubborn, this Harbor Freight angle grinder (same one I have) with wire wheel finished the job.

We then leveled all the surfaces of the head and cylinders with a huge file behind some more crocus cloth.

I'm not going to skim the head now, just going to keep the engine stock and see how it runs. Maybe later, but I'll probably focus on reliability and not change anything.
 

Attachments

  • FlatSurface.jpg
    FlatSurface.jpg
    223.1 KB · Views: 35
  • Gasket.jpg
    Gasket.jpg
    228.8 KB · Views: 36
Last edited:
Port Work

God damn these port were horrible. Looks like the cores for the ports shifted slightly off center during (sand) casting and the subsequent port boring left a ledge where the tool stopped. This is especially visible with the exhaust ports.

Using a die grinder I took down the ledges and generally evened out the surfaces but left the finish rough. The reason: with a perfectly smooth finish the air flow would be laminar, smooth. Like the first bits of smoke that come off the end of a cigarette. While this sounds good the problem is that with laminar flow the air velocity is highest right in the middle of the port, and drops off to 0 (theoretically) at the walls. Without enough velocity in that air the fuel cannot stay in suspension and falls out. The solution to this is to keep the flow turbulent. With turbulent flow the zero velocity is offset by the fact that the fluid is also tumbling and rolling, keeping the atomized fuel in the air where you want it. A rough finish encourages turbulence.

For comparison we took a look into the ports of a GSXR he had on the bench and they looked like they'd been gone over with 80 grit sandpaper. In light of that I asked him why port polishing is so popular. "People who do that have no idea what they're doing." Enough said.

You may notice that the ports are not circular as they close up near the valves. This is not poor manufacturing but rather Honda engineers trying to turn the air around the corner while keeping both the inside and outside paths close to equal length. I therefore didn't round those parts out and just left them as they were.
 

Attachments

  • IntakePort2.jpg
    IntakePort2.jpg
    67.1 KB · Views: 33
  • ExhaustPort1.jpg
    ExhaustPort1.jpg
    237.6 KB · Views: 35
  • ExhaustPort2.jpg
    ExhaustPort2.jpg
    117.9 KB · Views: 36
  • IntakePort.jpg
    IntakePort.jpg
    147.2 KB · Views: 34
  • DieGrinding.jpg
    DieGrinding.jpg
    83.9 KB · Views: 35
Last edited:
Valve Seat

The valve seats aren't in terrible shape but they're only contacting about 60-70% of the valve face surfaces. I would like to up that percentage.

Ted had a number of tools for cutting and lapping valve seats but unfortunately none of them would work with valves as small as the 160s. We tried a few things but it wasn't happening. I'll have to make a tool to hold the valve stem so I can chuck it up in a drill and spin it with lapping compound between the seat and valve face. A project for another day.

I also finally ordered a complete engine gasket kit and seal kit, carb rebuild kits, fork oil seals, new levers. I have to order some new piston rings too, guess I'll get to that tonight. Still need to find a few rubber bits like rear wheel "cush drive" rubber inserts.
 

Attachments

  • Dome.jpg
    Dome.jpg
    99.7 KB · Views: 36
Last edited:
Tank work

I'm going to do something different than the stock 160 badges/knee pads. It'll be a bit cheaper, more functional and most important it should look pretty sharp. :teeth

You'll just have to wait to see how it turns out, though.

Is anybody here skilled with photoshop? I'd love to do a mock of up what I have planned for the tank, but don't have the software.
 

Attachments

  • TankBondo1.jpg
    TankBondo1.jpg
    76.9 KB · Views: 34
  • TankBondo2.jpg
    TankBondo2.jpg
    217.7 KB · Views: 33
Last edited:
I've always heard you polish an exhaust port, not an intake port. The reason is to keep carbon from building up as well as letting the exhaust escape faster.
I've used an electric drill with a tight fitting piece of hose to lap valves in the past FWIW ,worked pretty well.

BTW I'm the guy you met at the wall with the 69 CL100.
I'll keep you posted on my progress trying to resurrect it.
I have an extra set of wheels from it if your still in the market
Jeff
 
Oh, cool, hey!

I specifically didn't polish either ports, I just removed the glaring obstructions. A little lip in the airstream can create a boundary layer or air that effectively blocks the flow, choking it.

Wait...I'll see if I can get a picture of what I mean...
 
Back
Top