• There has been a recent cluster of spammers accessing BARFer accounts and posting spam. To safeguard your account, please consider changing your password. It would be even better to take the additional step of enabling 2 Factor Authentication (2FA) on your BARF account. Read more here.

[Moto] Art Project: Making a $100 Bike Look Priceless

DSC_0079_zpsada52691.jpg

The two (red) metal brackets have been welded onto the Yamaha frame to bolt the Honda engine at all points. Since the bike's not gonna be a runner, I'm thinking of removing the bottom bracket. I don't want any of my kids or pet getting themselves snagged or cut from it if this does end up in my living room. Or I may just round it off.

DSC_0080_zpsdf86fd58.jpg

X marks the spot. Because I might get hack-happy once I turned the grinder on, I marked the tabs that have no purpose for this project, so I know which ones to remove, and which ones not to.
 
DSC_0082_zps75b2227f.jpg

De-tabbing the chassis - arguably the most fun part of the project! :laughing

The whole bike's apart now, so I'm hoping to get refinishing quote(s) in the next couple of weeks. In the meantime, I'll still need to de-spoke the wheels, then split the engine cases. I'm hoping to at least have all the parts and pieces I'd want copper-plated/powdercoated done before I start polishing the rest.
 
So I had a realization while I was in attendance at the BARF Quincy Rally, which was probably spurned on by watching shows like Cafe Racer and What's in the Barn? in my 5-star suite. I thought:

"If this is my art project, why am I going to hand it off to someone else to color it?"

As in, why pass it along to the powdercoater or metal plater to actually put the finishing paint on it? I didn't build this bike, so if I'm not the one that's going to (re)finish it, what good was I?

That didn't sit well with me, so I decided to scrap the idea of either plating or powdercoathing any parts of the bike. I decided to refinish the bike myself. Obviously, I don't have an oven large enough for the chassis, so a DIY-powdercoating route isn't feasible for me. I could've just bought some metallic spray paint in copper color, but no. I've decided to try a different kind of finish that I found accidentally.

DSC_0083_zps258512f4.jpg

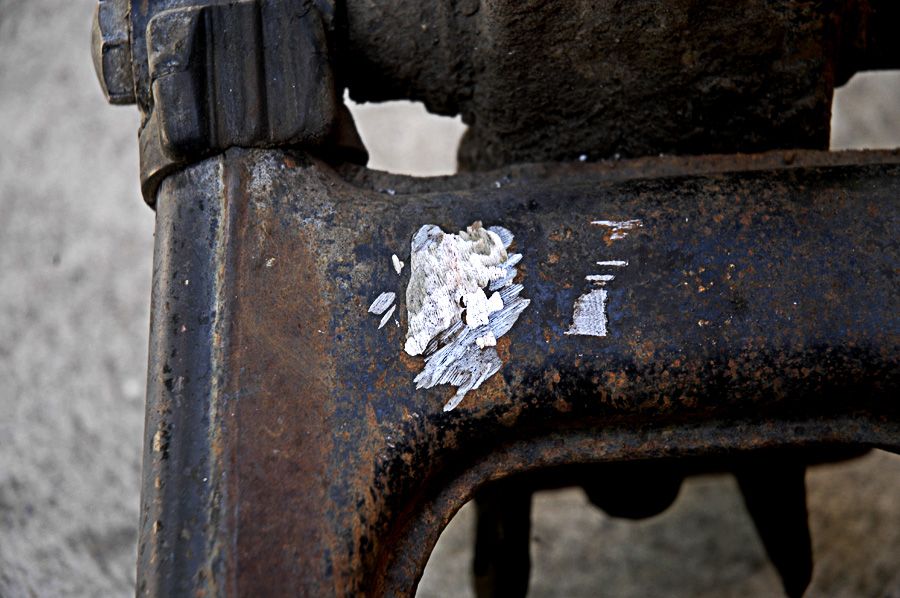
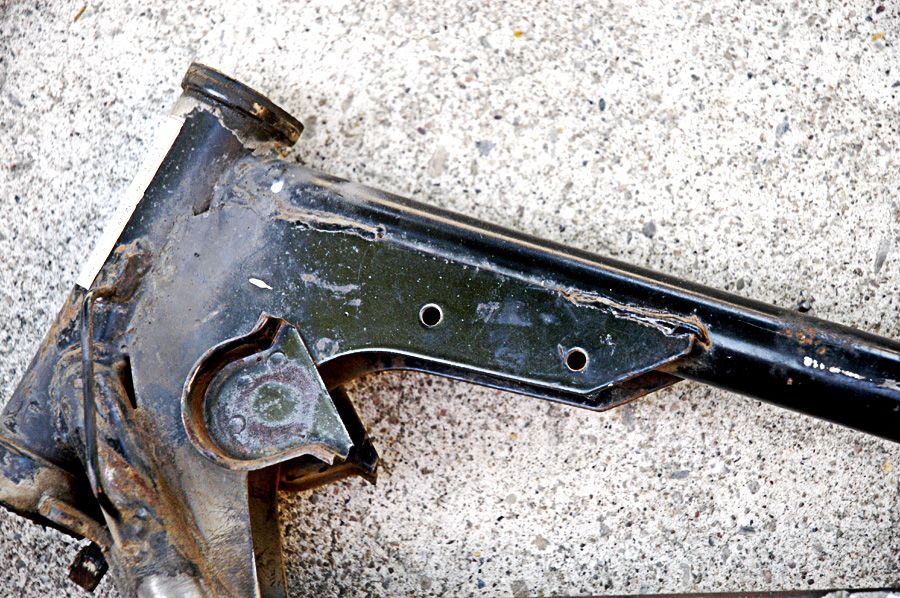
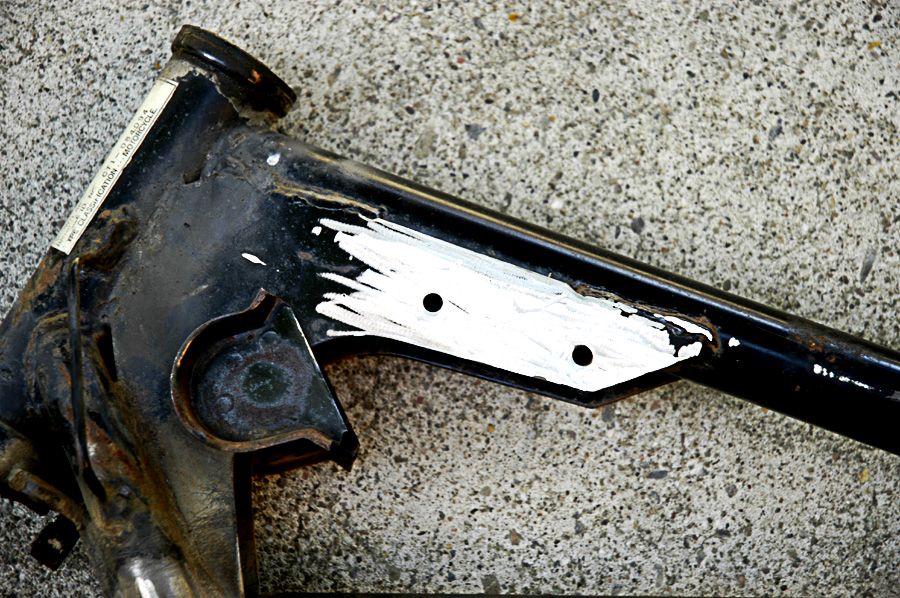
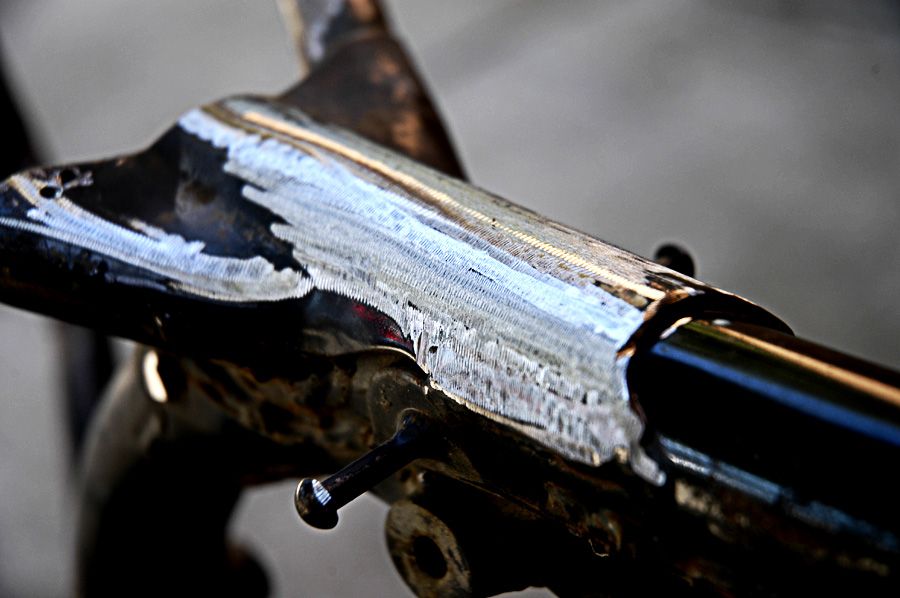
That's a part of the swingarm that I've de-tabbed, and in doing so, I realized that the grinder left that part of the swingarm textured, yet glossy. It gave me an idea.

So I grabbed my paintbrush...

DSC_0085_zps041fba91.jpg

...and I went to work.

DSC_0087_zpsed2d6ceb.jpg

DSC_0088_zpsb16d5e94.jpg

I'm really digging the kind of finish I'm turning out with on the steel chassis, just by skimming it with the grinder in various long and short strokes, leaving varying rows of grinder marks, which plays with how the light hits it as you view it around. And the textured finish adds a really raw feel to the chassis.

DSC_0086_zps69396da6.jpg

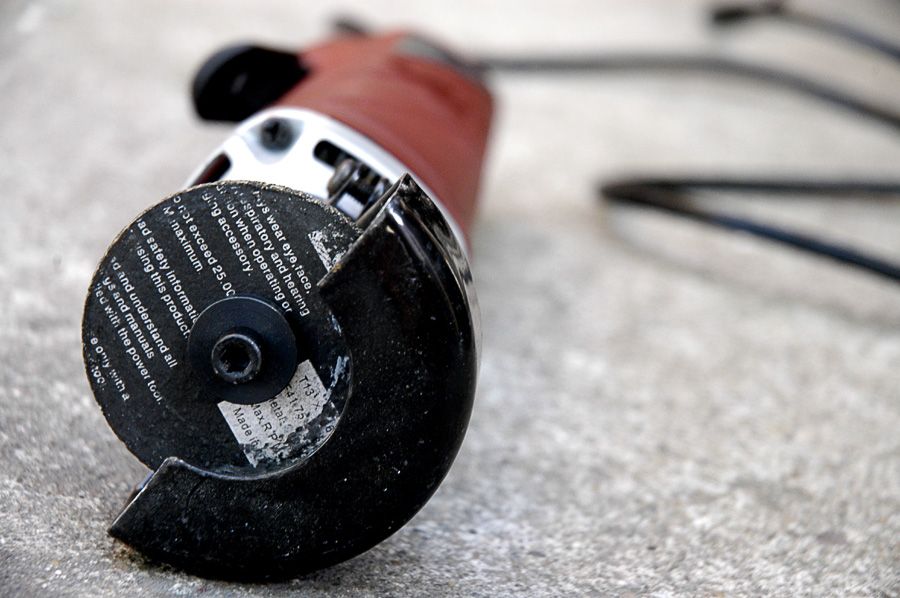
A couple of problems I foresee with this kind of finishing though; even with a small rotary tool fitted with the smallest grinding wheels I can find, I have a feeling that there are just going to be some nooks and corners that I can't get a grinder into. On the upside, save for the swingarm, the majority of the chassis will be hidden under the tank, seat pan, and a bit by the engine anyway. We'll see. maybe I can even brush paint any small parts I can't grind in silver or something.

The other thing is that this is pretty time consuming. But hey, now it REALLY feels like an art project to me. :thumbup
 
Wow, Dennis. Good on ya' for taking this project on. With time constraints, commitments and umpteen other "excuses", I'm gonna have to live vicariously through you and this thread.

Big fan...of this project and your R1 :thumbup

For me, I'd eventually turn it in to art-on-wheels project and HAVE to have a running motor in there to cruise around town on. Again, that's just me so I'll kindly accept your offer to mind my own beewax or to locate my own CL barnfind and pound sand.

Thanks for chronicling the journey for us regular folk!

I don't mind. Hell, I've had people PM me and tell me in meat-space to keep this as a running piece of art. :laughing

Maybe down the line, maybe not. :)
 
i bet ud get a similar look w/ one of these and itd go a lot faster

4-5x7-8-Jumbo-Zirc-Flap-Disc-Grinding-Wheel-60-Grit.jpg


for nooks and crannies, media blasting?

u gonna but a clearcoat over it so it doesnt rust?
 
i bet ud get a similar look w/ one of these and itd go a lot faster

4-5x7-8-Jumbo-Zirc-Flap-Disc-Grinding-Wheel-60-Grit.jpg

You think so? I tried to start off with the grinding stones on my rotary tool and the finish wasn't quite the same. Plus, I'd have to buy an angle grinder for that wheel, no?

Clear coat? Yes, for rust protection. Thanks for the tip! :thumbup
 
For that bit you'll need a grinder. Also look at 3M, they make a green and a yellow sanding disk that can get into deeper and harder to reach areas. They work really good. Also check with Eastwood, they sell a spray paint clear that is based for bare metal protection. Good Luck. Can't wait to see the finished project!!
 
The tips are much apprecated guys, gives me options! :thumbup

DSC_0089_zpse8064560.jpg

I decided to start breaking down the engine to remove all the internals. The other purpose of this bike and this project is for me to finally get my hands really dirty and really get into an engine. With all the bikes I've ever owned and maintained, I've never pulled an engine out, much less open one up and dismantle, which is something that I've always wanted to do.

DSC_0090_zps9562ca4e.jpg

Looking at diagrams and all are fine, but there's no substitute for looking at the real deal. I've always been intimidated by the inner-workings of a motorcycle engine; so many moving components in varying sizes and all working in synchrony. I just didn't want to be fiddling with something, and create a domino effect of problems.

Which is why this project's perfect in pacifying that intimidation - I don't have to worry about what I break since they're all coming out anyway :laughing!

DSC_0091_zps37fbac52.jpg

I managed to at least get the cylinder head out, before I got stuck on trying to remove the clutch basket nut since I don't have an impact wrench, and couldn't successfully keep the clutch from rotating as I tried to wrench the nut out. I ended up calling Rob for tips on how to make do without an impact wrench, and I'll probably YouTube some videos for possible improvised tools.

DSC_0092_zps261857e1.jpg

Seriously, this was easily one of the best $100 I spent. I'm looking at some of these parts and thinking of how I can re-purpose them for decor in my garage or on my desk at work! :laughing
 
I managed to at least get the cylinder head out, before I got stuck on trying to remove the clutch basket nut since I don't have an impact wrench, and couldn't successfully keep the clutch from rotating as I tried to wrench the nut out.

Stick a rag between the gears. :thumbup
 
I'm assuming you guys mean the gears on the transmission side, right? Cause I think I was doing it on the crank side last night. :facepalm
 
Da big gear attached to the clutch basket, and de liddle gear attached to the crankshaft. I like a rag, because you can't damage the gears. Just the rag.
 
Oh, well I did that yesterday, stuck a flat-head between the clutch gear and the crank, but the basket spun independent anyway. :dunno
 
if one side spins, jam the other side. using a softer metal to jam it will prevent damage to the gears, penny? but im not sure if it matters to u.
 
Last edited:
I agree that a flap wheel will probably be the best way to get a reasonable finish. A cheap Harbor Freight grinder should do the trick, $20ish. Not like you'll be using it a ton.

I would advise against clearcoat, it changes the look. Instead I would wipe it with WD40. You may have to scotchbrite it every now and then, but that's not too hard.
 
I would advise against clearcoat, it changes the look. Instead I would wipe it with WD40. You may have to scotchbrite it every now and then, but that's not too hard.

Curious, how so?

I'm actually kind of double-backing on myself here; I initially thought of painting the chassis, then polishing the tank/seat pan/headlight bucket. But when I decided not to hand over the chassis to someone else to plate/powdercoat, I decided to switch it; grind-finish the chassis, then paint the body.

Now I'm thinking about going back to the original plan; spray-painting the chassis, polishing the body. :facepalm
 
Back
Top