Part 2: the 2019 detour (continued)
With the crazy girder completed, I now move to the middle and rear of the bike. For the front I followed closely to my CAD design. The rear would be much more "figure it out as I go" with a few simple goals in mind...
- utilize R6 tank and seat
- keep the ergos as comfortable as possible (have learned this lesson from past DBC bikes that were VERY uncomfortable)
- make sub-frame strong enough for rear shock loads
- create some type of utility rack (DBC now requires two nights of camping, so need to attach tent and sleeping bag on the back)
- try to add some design details to the rear to accent the front
- and of course provide a place to mount a tail light and license plate
So with these goals in mind I begin the fabricate a rear sub-frame figuring out the details as I go...
With the old sub-frame removed, the main frame is cleaned up to erase any residue of the old sub-frame...
 20190811_122915
 by
andbike, on Flickr
Oh look... there's a custom swingarm on there! I'll come back to that later.
 20190811_135650
 by
andbike, on Flickr
Rear sub-frame begins with a long loop of tubing. The R6 tank is used to find correct placement to the main frame, and progresses from there...
 20190811_192318
 by
andbike, on Flickr
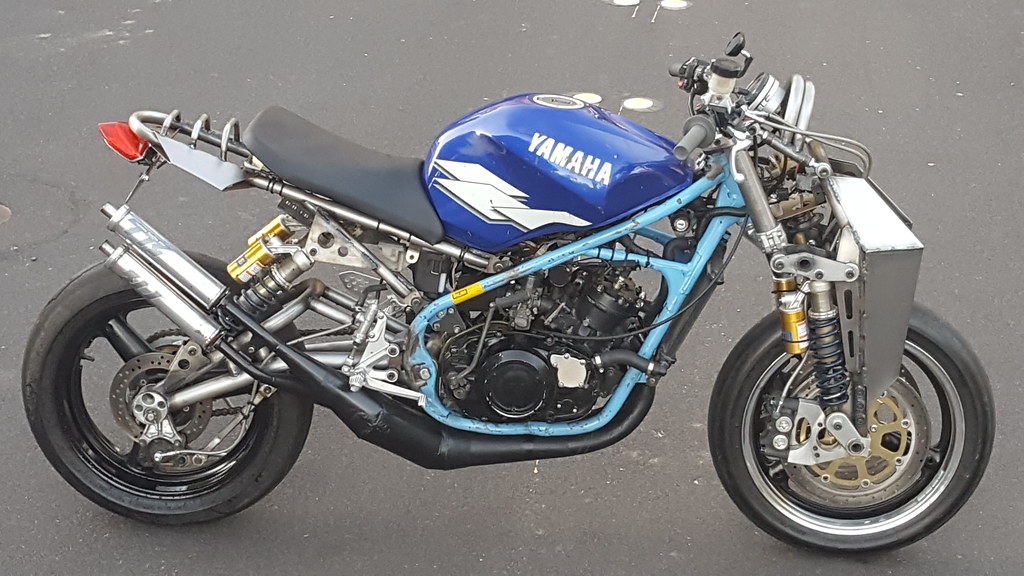
I don't have a lot of pictures of the sub-frame construction... so magically its done. Rear tank mount, seat mounts, utility rails, and sheet metal wings to match the front. The wings have cut outs on the bottom that allow for bungy cords to grab along the edges, thus providing added functionality...
 20190821_181200
 by
andbike, on Flickr
Okay, getting back to the swingarm. The original design intent is to utilize a TZR250 3XV swingarm on the custom frames. With that in mind, I decided to design a custom dual-shock swingarm with similar shape and geometry to the TZR arm. For shocks I'm using Ohlins shocks off a 90s era Yamaha snow mobile. These have been coming up for cheap on eBay (I guess snow mobile guys don't care as much for Ohlins parts as moto guys). Because they are for a snowmobile application, they are much stiffer than a similar moto shock. So my design takes the stiffer spring rate into account, thus the exaggerated mounting location. I will also replace the spring with aftermarket Hyperco spring that are a little softer.
Here are a few photos of the swingarm construction...
 20190714_092405
 by
andbike, on Flickr
 20190713_171958
 by
andbike, on Flickr
 20190714_092320
 by
andbike, on Flickr
 20190714_153808
 by
andbike, on Flickr
A few other detail include modifying and mounting the expansion chambers, foot controls, and lighting...
new cups to adapt the expansion chambers to the Banshee cylinders...
 20190803_182844
 by
andbike, on Flickr
Bracing added to the upper linkage. The high bend is to clear the tachometer...
 20190810_185445
 by
andbike, on Flickr
Tapping screw holes in all of the CNC parts...
 20190809_160527
 by
andbike, on Flickr
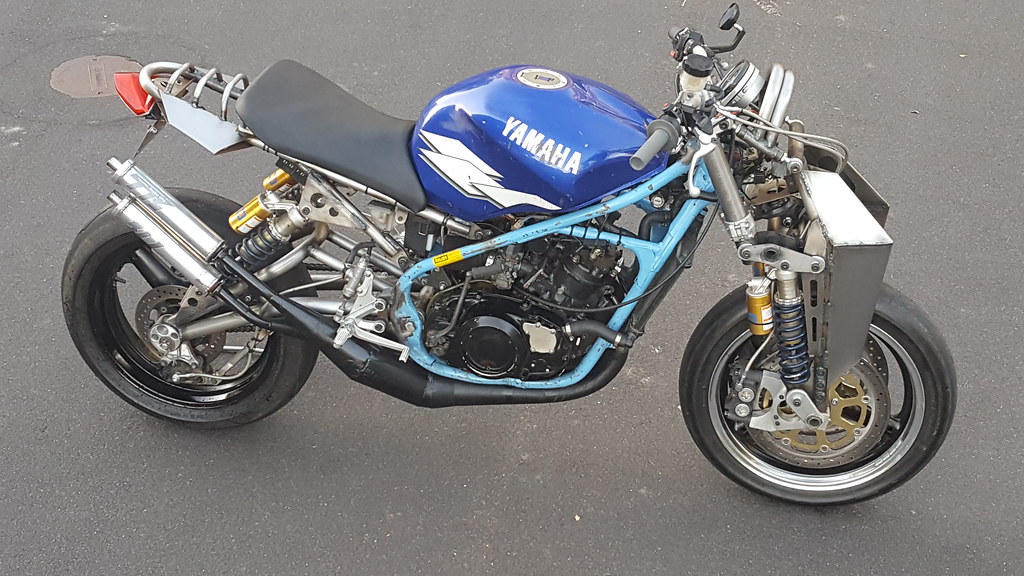
Here are a few detail photos of the finished bike...
 20200802_185627
 by
andbike, on Flickr
 IMG_0661
 by
andbike, on Flickr
 IMG_0662
 by
andbike, on Flickr
 IMG_0664
 by
andbike, on Flickr
 IMG_0669
 by
andbike, on Flickr
 IMG_0679
 by
andbike, on Flickr
 IMG_0685
 by
andbike, on Flickr
")