• There has been a recent cluster of spammers accessing BARFer accounts and posting spam. To safeguard your account, please consider changing your password. It would be even better to take the additional step of enabling 2 Factor Authentication (2FA) on your BARF account. Read more here.

Build Thread: 74 GT-750

SonoraMike

2StrokeAddict
Joined
Jan 25, 2012
Location
Sonora
Moto(s)
03 + 07 R1, YZ250,
CB550, GT-750, Tank Scooter
Name
Mike
originally started here: http://www.suzuki2strokes.com/forum/viewtopic.php?f=20&t=11947 but moving things over here, more eyeballs and feedback to issues that will pop up along the way. First few posts are dups of what was originally posted

New project in the garage, a 74 GT-750 came home with me yesterday, currently code named "Triple Trouble" after one of my fav blues lineups of Tommy Castro, LLoyd Jones, and Jimmy Hall.

Lots of 2 strokes in my past, H1, TZ250's, RD's, and a double digit number of RZs with a badly deteriorated KR awaiting some TLC, some of these I still cringe when I think of the price that I let them go for. I'm at the point that I'll never sell another bike again

I've had my eye out for a GT750 for a few years now, spotted this one initially on CL and then again on the Bay Area Riders forum with more detail. Looking over the photos things seemed to be mostly there but the bike shows a lot of weather exposure.

oSfdea2_zpse7wsqspl.jpg


oVoOjSp_zpsbwod7xrj.jpg


http://i187.photobucket.com/albums/x251/sonoramike/1974%20GT750%20LeMans/Purchase%20day/PTBMHK6_zpsmmn7hojy.jpg[img]

Had a few surprises during the walk around once I got to the shop where the bike was, the biggest was all the rust in the tank. When the seller said it had stopped running since he'd last worked on it I figured that was a decent clue as to what was up. Confirmed this when I lifted the cap and had a peek into the tank and ran my finger around. The wiring under the left cover was a bit sketch, I'll get to the photos of all that soon enough as this all plays out. And the exposure damage from being outside near the NoCal coast is a much diff experience in person than trying to get a feel for it in photos. But its a 40 year old bike, so you get what is coming no matter what.

But 140# cylinder pressures across the board, and the fact that it was mostly complete/original with a clean title kept me in the game. The seller and I found the right price, pushed it up the ramp and into the truck, and loaded up a box of spares, and 2 old school saddle bags of misc parts into the truck. Then to the long drive home.

Next up: fuel system
 
I've been working on my 03 R1 track bike for the last week yanking the engine out due to a snapped crank. After a few hours of electrical connectors and throttle bodies and incredibly cramped working spaces in the R1 frame - getting into the GT was like stepping back to cave man days, so simple to work on, quite rejuvenating.

Build plan for the bike is:
92 GSXR750 front end swap
new 36 spoke GSXR hub
17x2.75" or 3 alum rim on the front
look into widening the stock rear swingarm if possible
if the widening works out then some add some top swingarm bracing
17x4.25" alum rim on the stock rear hub
chrome spokes from Buchannan, really wanting to stay with the spoke look but on a wider track with access to all the 17" rubber
Jemco's painted black
Uni pods
recover the seat
Koni's or equiv in the rear
replace all the phillips screws with hex head bolts, in fact hex head will be used where ever possible
electronic ignition

So first thing is to get it running before really tearing into it. With all the rust in the tank the first thing is to drain it and get it prepped for electrolysis cleaning. Petcock has a known shutoff problem so prev owner installed an inline shut off, and vacuum input port of the petcock is blocked off. Assuming something wrong with the diaphragm. Grab the 5 gal gas jug, unscrew the 9mm line from the carb inlet, drop the line into the jug and turn the petcock/inline on to drain the tank. Thing pisses fuel out slower than an old man with a prostate issue. Ok... Grab big funnel and put it in the top of the jug, pull the tank off and flip it upside down to get it drained out of the filler hole. Gas is a bit discolored, some dust in the bottom of the jug. Put the tank on the bench to get the petcock off.

Just a bit of debris. This is after I knocked a bunch of rust off before I remembered to grab the camera to help document the project.

The spacer:
DSC00481_zpsnl55bwpo.jpg


Something has knocked a notch out of the spacer at the 6 o'clock position, you can see that the o-ring has some distortion. But no tear and looks fine to reuse.

Crud was piled up high on this:
DSC00482_zpsgc8yxb0c.jpg


Mostly cleaned up for visual inspection. Confirmation that the vacuum diaphragm is bad, I've never seen one quite that far gone before...
DSC00484_zpsxpt9xrnr.jpg


rust/junk that came out of the petcock, the bung is off of the vacuum port connection:
DSC00485_zpsporag2qr.jpg


Cleaned out the last of the gas into the drip pan and got this left behind:
DSC00486_zpscgttgvep.jpg


Clearly there is going to be a problem downstream, time to look at the carbs. Pulled the drain plug off the #1 carb, same rust/dirt/mung in the recess so no need to go any further, time to pull the airbox and pull the carbs out for a long dip. Old, dry rubber intake boots make for difficult tugging, but at $35 a piece they are going to stay old and dried up for awhile longer. Carbs out and on the bench.

DSC00487_zps959mgrho.jpg


Initial finger check of the diaphragms didn't show any problems, but not sure what the diff drain plug in the carb on the R is all about yet. Pretty dirty overall. Original "chrome" stickers on the sides of the float bowls. Diaphragm covers should polish up nice. Don't think the golf tee in the vacuum line will make it into the final build. That shortly fuel line connector between the center and R carb prob won't make it either.

New 1/4" clear Tygon fuel line on order for use all around, along with new 3/16" clear overflow line

So much easier to work on this than the R1... Into the carbs later today
 
Due to a severe desire to avoid anything having to do with Christmas, shopping, Amazon, work and being outside in the rain - I decided in a fit of brilliance to log some garage time and work to get 2 of the 3 the carbs that were stripped into the gallon paint cans of Berrymans carb dip for a long soak.

Marked up my carb disassembly tupperware containers from the GS1100G rebuild for use with the GT - 3 tubs marked L C and R. And got to it. Checked the diaphragms - all good (thank god)

2 of the 3 carb bowls dry. It won't run like that. The float bowls are a mess as expected. All 3 float seat screens nearly clogged as well. 1 stuck pilot jet that I'll need to work on drilling out in the daylight. The right needle is showing a shiny spot at the top taper area from rubbing on something - nozzle maybe? Didn't look for the other side of the rub yet, will need to add a new needle to the big initial parts order. Choke bar needs some time on the wire wheel so that it doesn't hog out the guide in each carb when it is removed. Other than that it was pretty straight forward. I'm supposed to have a Mikuni rebuild kit in the spares, tomorrows job is to organize the spares box, dump the junk, and throw the old school saddlebags and mounting hardware on fleabay. One mans junk and all that...

Feelers out locally for someone who does soda blasting to get a bit of cleanup work done on the carbs. Polishing them feels like overkill. But in the spirit of dropping a few ounces here and there adds up to pounds - seems like some weight could be dumped by redoing the bottom carb gang rail bar along with the top cover gang couplers in aluminum instead of steel - has anybody tried/done this before?

Anyway, on to the photos:

Bottom gang rail view with bowls still on
DSC00494_zpsv8ugbhlk.jpg


Funky bowls and innards, looks like this throughout
DSC00498_zpsgjv8gz9n.jpg


float shutoff, screens mostly clogged as well
DSC00497_zpseulayhho.jpg


needle polished from rubbing around - lack of spring pressure due to not being properly seated on the keeper? more inspection needed here. At least all the needles were stock and on the 3rd clip. 110 mains, 47.5 pilots all around as well, air screws out ~1/2 turn.
DSC00500_zpsk0bnm4is.jpg


The gas tank is all dried out now. So before heading back into the warm house I gave it a few shakes to see what would fall out. Got a big surprise that mostly missed the drip pan out of the petcock hole.

DSC00503_zpsljxiygcq.jpg


Talked to my car buddy earlier today about borrowing his old school battery charger to get the inside tank rust killed by electrolysis ->
http://www.myfordtractors.com/electrolysis.shtml

https://www.youtube.com/watch?v=SyG0mu2T4u0

Mulling the idea of trying to run 40mm Mikuni Super BN carbs on the 750 sometime in the future. A guy on my racing kart forum raved about them and the "bark" they give the CR125 two stroke engines we run on the shifter karts.

So where can I get a petcock rebuild kit that includes diaphragms - or just the diaphragms themselves? I see the rubber o-rings for the spacer that the top of the petcock available for sale, but no vacuum diaphragms available anywhere so far. Could use some assistance with this one

Called jemco about pipes, still $600 + $40 shipping for bare pipes. They'll end up painted black with hi-temp rattle can paint. Found the Uni pods I'm after on Amazon. Have a sense of where I need to be jetting wise, will see if I have the parts I need to make it so in the spares tomorrow.

Will go borrow the battery charger tomorrow and get that gas tank setup to start to boiling all that rust inside away before anything else. Then the wiring cleanup begins after that. If the carbs clean up quickly then I'll get the fuel bottle out to see about starting it without the tank after reassembling the carbs. But wanting to keep making basic progress and trying at all costs not to get into the beautifying stuff yet, but that damn polishing wheel is sitting right there... Must-not-succumb-must-not-succumb

That's it for today
 
family in town, so not much progress yesterday on the GT. Carb bodies are still sitting in the dip tank soaking away. Took the chain guard off to have a look at clearance for a wider rim. Logged a bunch of time looking into the Mikuni Super BN carbs, the BN44-40-8052 carb seems to be the ticket. Almost pulled the trigger on ordering one to play with and design an intake adapter for, but need to get the GT running first before going crazy on parts and new directions. Looking into petcocks still, going to see what the bolt spacing is to see if that opens up my options. As others have already noted, paying $130 for a petcock is nutty. There have to be other options

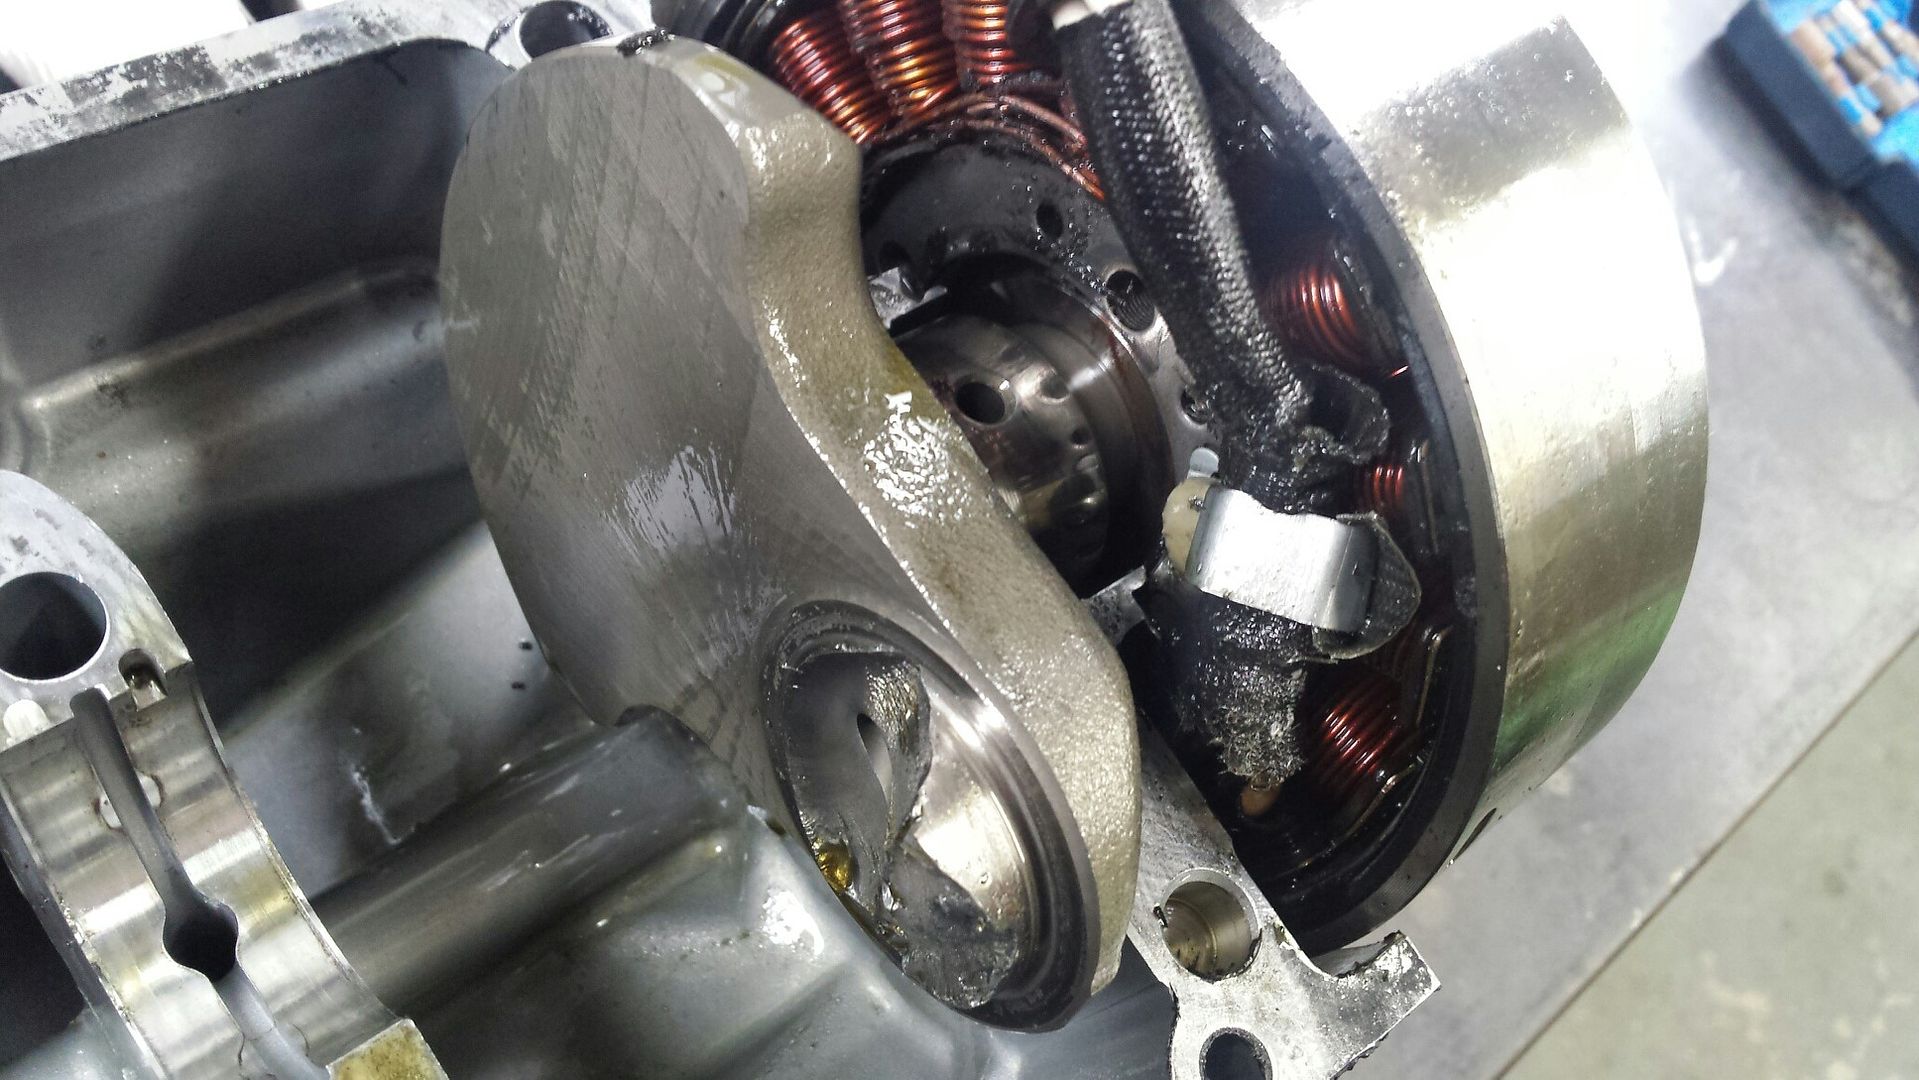
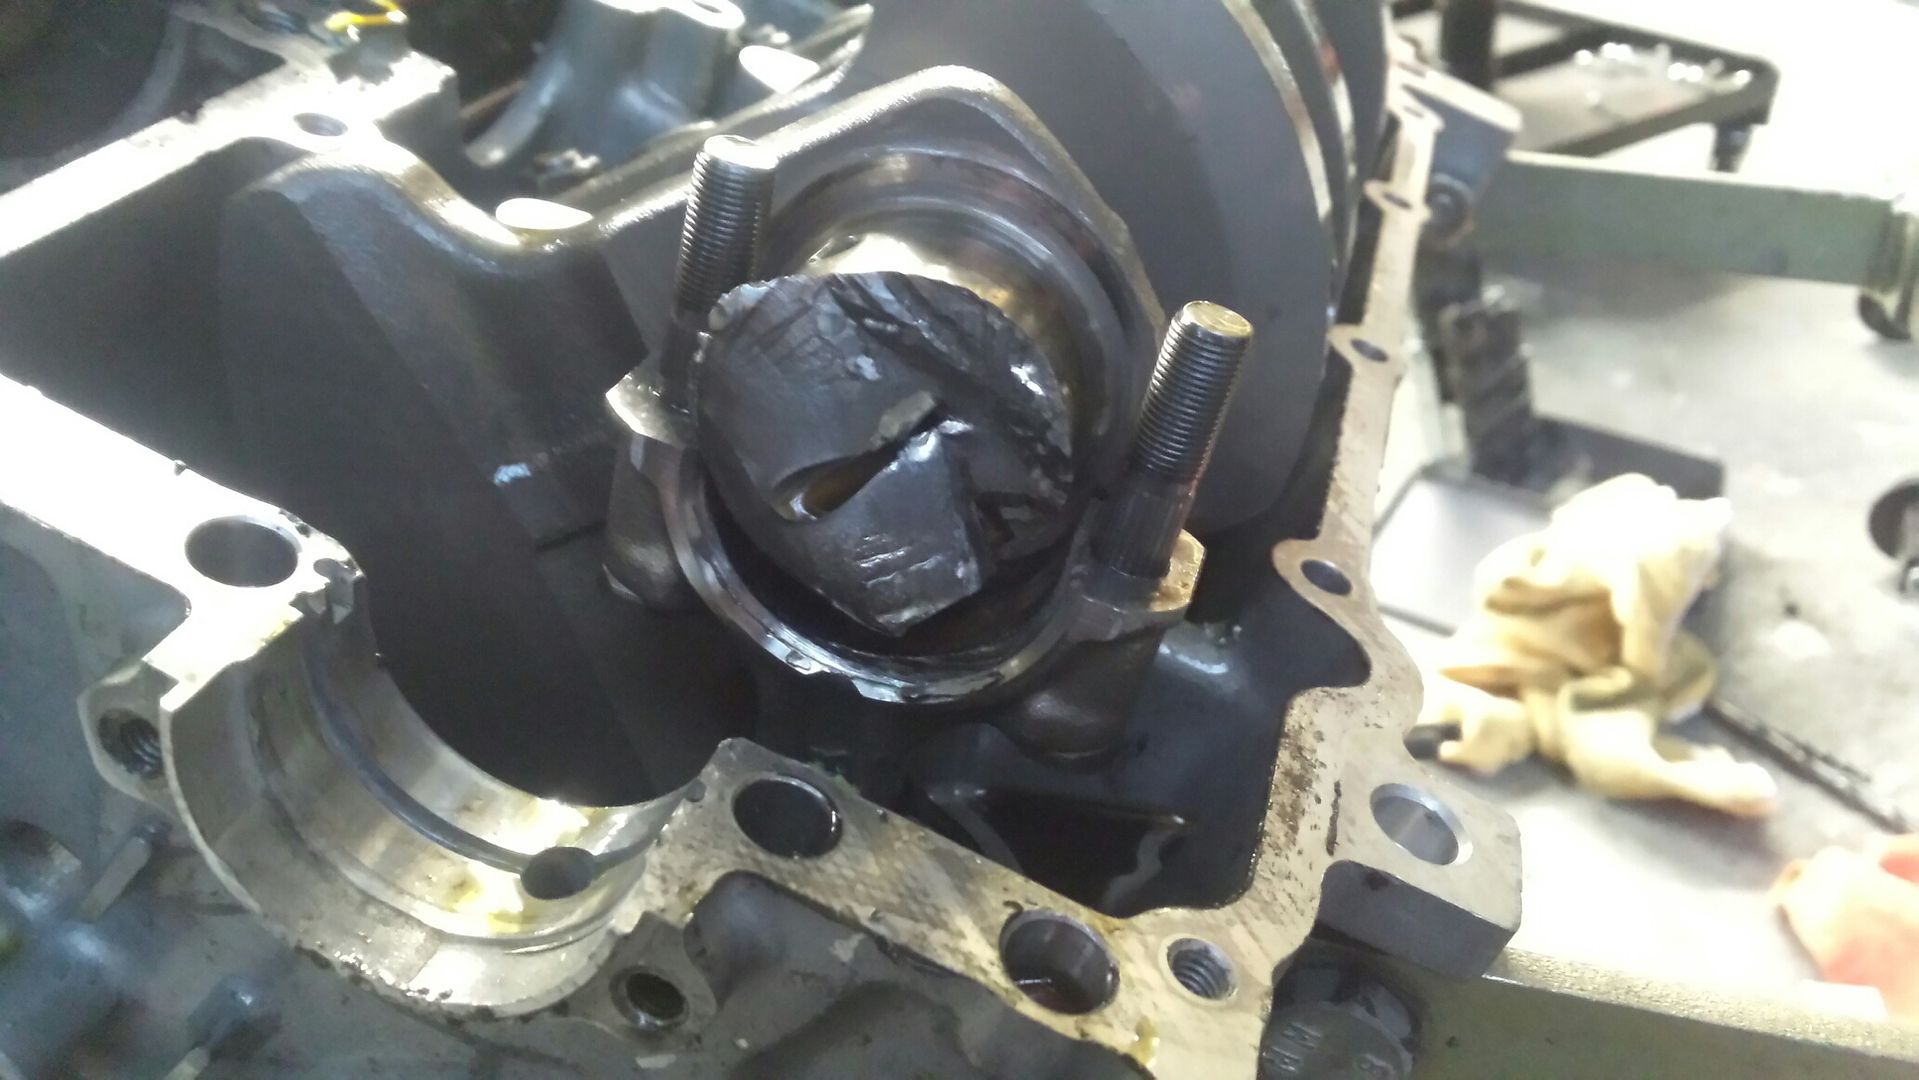
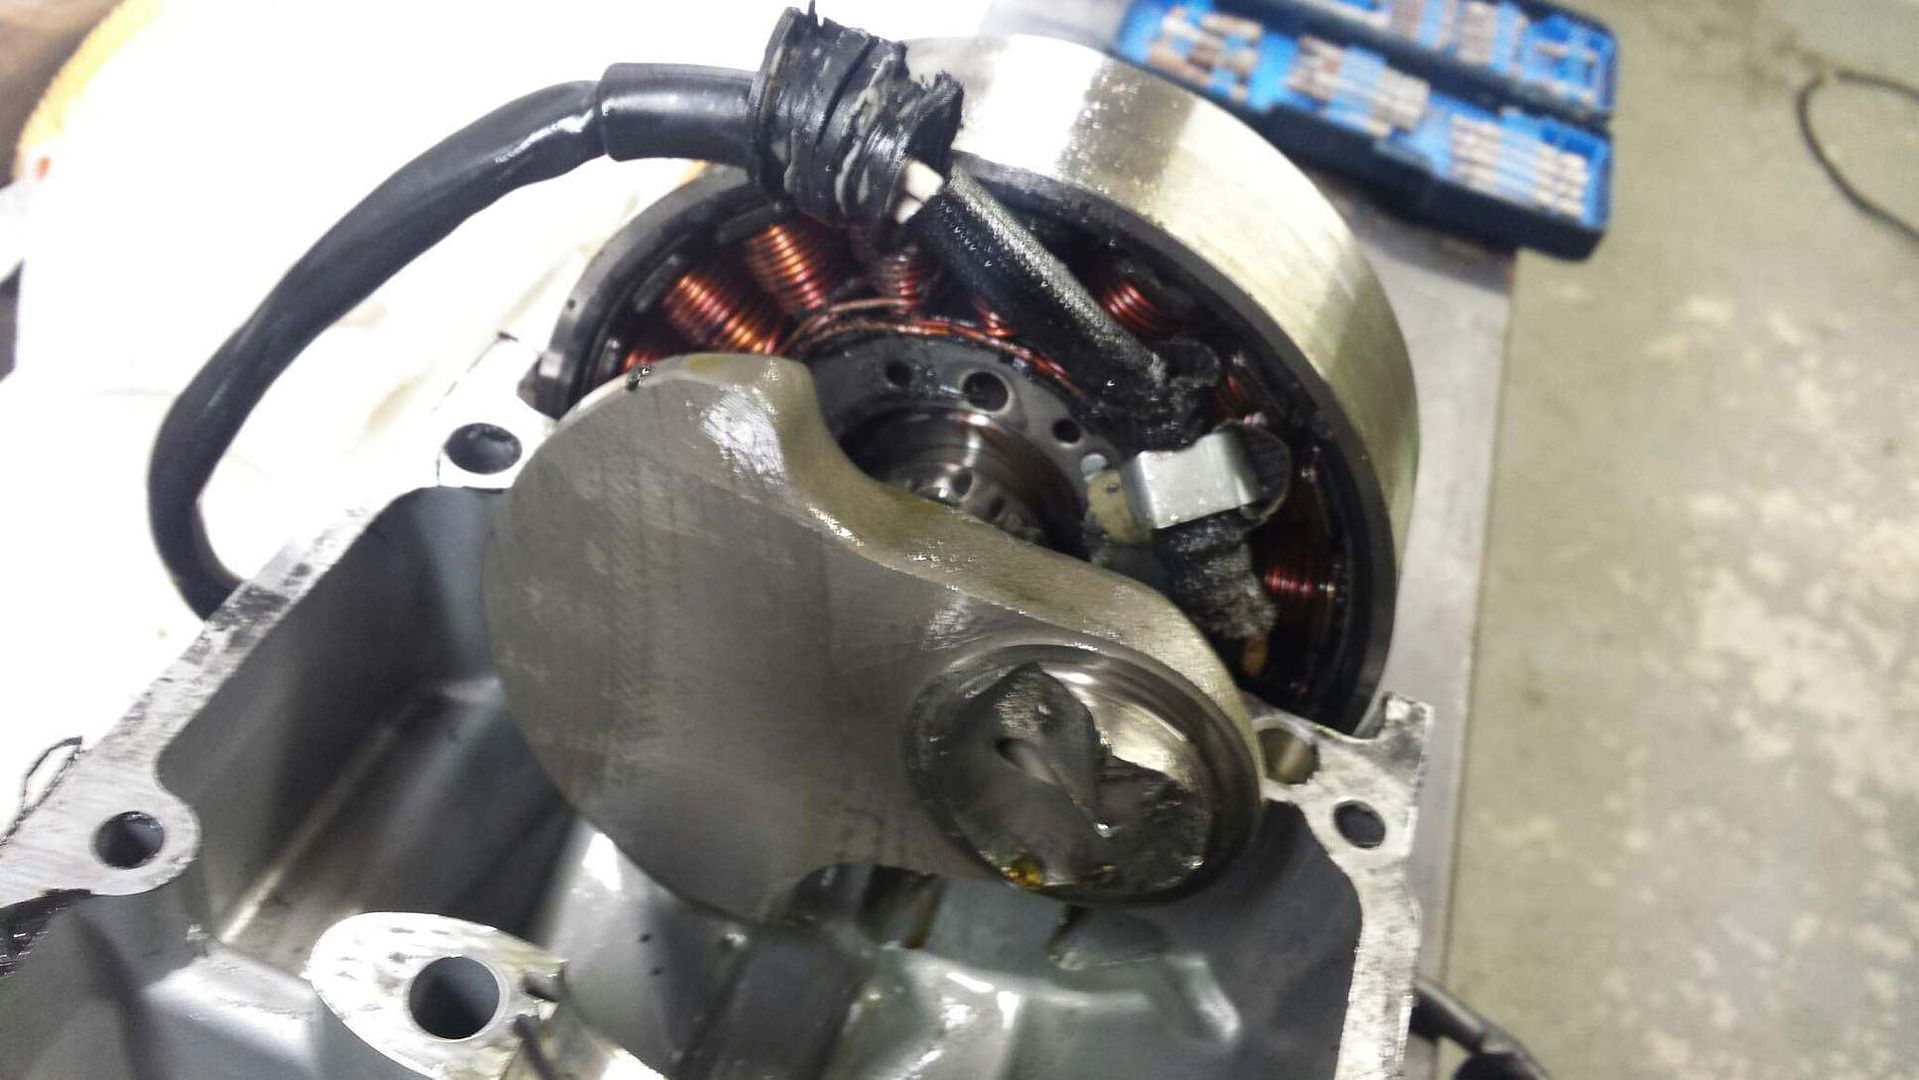
In the interim some photos of a snapped R1 crank for your viewing pleasure to keep things going here, snapped at the #1 rod journal. Amazingly it was running, loudly, for 5 minutes or so after this happened. Cases intact as well. Just a snap, no heat signature on the journal.... Needs a crank, rod, bearings all around, a flywheel (have to cut it off the tapered end) and a stator (ruined during the flywheel extraction) to get back on its feet.
20151220_165651_zpsqiote1mw.jpg


20151220_164416_zpsctlxbglt.jpg


20151220_165624_zpsqvg0qi4p.jpg
 
so looking at the petcock, it measures out with 44mm bolt spacing. Pretty common size for Suzuki and Kawi it seems. The Suzuki 44300-45372 fits all sorts of models, outputs on the correct side, correct bung size, has vacuum, reserve, and flows fuel to support an 1100 - ~$50 + the ride. Z1Enterprises apparently has a few generics, but their site has been down for awhile now and the internet wayback machine doesn't go that deep into the site to show product specifics. Mulling a Pingel as well, apparently they are a bit like Petronix where people either swear by them or hate them.
 
ordered the POR15 motorcycle tank repair kit last night, off to grab battery charger and A&H cleaning soda and some 1/4 threaded rod to get the tank started on a boil later today.
 
Go Mike!!

Cool stuff man. Hope it works out just as planned.

this belongs in the vintage cafe bro
 
Go Mike!!

Cool stuff man. Hope it works out just as planned.

Thanks, me too.

Maybe the mods can move this to the vintage cafe sub where it seems it belongs
 
Soak those carb boots in wintergreen oil. It'll make em supple again.

No need for electrolysis if the rust is that fine. Last similar tank I did I just used mechanical abrasion (a handful of old bolts and some paint thinner), then rinsed with boiling water, dried with a hair drier, and converted the rust with POR-15 etcher. Worked great. I'd only bother with electrolysis if there were big flakes of rust that you couldn't abrade.

Nice project! Looking forward to more.
 
No need for electrolysis if the rust is that fine

how is the fine rust dust supposed to avoid clogging filters and float valves and float valve filters and jets? It needs to come out, all of it.

At the very least I'm going to electrolysis boil it clean to kill all the rust, then coat it with 2 stroke oil to seal it. Then see how it goes over time.

Seems like worst case after that would be a very quick boil to kill what little rust regrows, and then reevaluate either a POR15 coat or more cycles of two stroke oil coating/boil as necessary
 
Last edited:
Up to you Mike.

Just quite a few guys that hang there and know lots about searching old parts and such.
They enjoy the tale as well.
 
Thanks, me too.

Maybe the mods can move this to the vintage cafe sub where it seems it belongs

Done. Cool stuff. I had one of those - a 72 actually - back in the day.

For the rest of you, here's a little moto trivia question related to the OP's bike: What factory feature which is now commonplace, first appeared on the OP's bike?
 
Up to you Mike.

Just quite a few guys that hang there and know lots about searching old parts and such.
They enjoy the tale as well.

good suggestion, I can use all the help I can get.
 
Done. Cool stuff. I had one of those - a 72 actually - back in the day.

For the rest of you, here's a little moto trivia question related to the OP's bike: What factory feature which is now commonplace, first appeared on the OP's bike?

Liquid-cooling? Guess the nicknames
are a clue ... water buffalo and kettle ... :laughing

Hear the drum brake on the '71 is sought after ...

Cool thread with added bonus engine carnage pics ... :ride
 
Liquid-cooling? Guess the nicknames
are a clue ... water buffalo and kettle ... :laughing

Hear the drum brake on the '71 is sought after ...

Obvious, but also wrong. The Scott Flying Squirrel beat it to that claim by decades.

scott_flying_squirrel.jpg


Care to guess again?
 
Nope. Here's a hint: It's incredibly obvious, it's right in front of you.
 
Nope. Here's a hint: It's incredibly obvious, it's right in front of you.

a computer screen?

I know what it is now, but I'd push back a bit on "commonplace" - my 03 R1 doesn't have it, but agree that it is more common than not, so meh
 
Last edited:
a computer screen?

I know what it is now, but I'd push back a bit on "commonplace" - my 03 R1 doesn't have it, but agree that it is more common than not, so meh

I don't know what computer screen you're talking about. The feature that the GT750 pioneered (not the early ones, by the way) is, in fact, on your 03 R1. I can't think of a single liter bike or 600 for decades that has not had this feature, yet your GT750 was the first mass production bike to have it.
 
Back
Top