akathisia
Gait Plagiarist
- Joined
- Jan 19, 2004
- Location
- Mainly in the garage
- Moto(s)
- '74 CB550, '77 RD400, '79 Vespa P200E, '01 996, '03 R4.5, '03 RT1150
- Name
- PJ
unbelievably fantastic job you are doing on this bike.
") wtf) so I won't be done as soon as I hoped.
wtf) so I won't be done as soon as I hoped. 
Rain?
It hasn't rained in weeks.... your washer must just be leaking!

Is it raining now?
The back room is completely submerged and in the 10 minutes it took me to clear the tools and parts from the floor and raise everything on pieces of wood or whatever I could find, so was the laundry room. And it's still coming down, hard. I just hope not too much stuff gets FUBAR.
weather.com said:The next storm arrives in California Wednesday morning and that one looks a little stronger than today's storm.
my first thing to add of any merrit is to warn you about the Pacific Pounding


Thanks akathisia
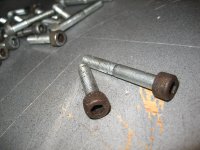
Getting the cases back together is proving difficult. It seems like I can do it if I stack all the parts in the top and stick on the bottom instead of the other way around.
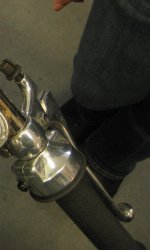
WOW. Those perches look great, I had to reread your post twice to understand exactly what you had done. For a second I thought you had bought them like that!
That reminds me that somewhere in my pile downstairs I have a set of 60's Gilera-ish clip ons that have the perch built into the clipon. Terrible design idea in many ways, but a very cheap way for the perch to be made. I might dig them out later and post up a pic or two.

hey David,
congrats on the acquisition - is your sure-wish-I'd-had-1-of-those new part from a sloper or a vertical 175?
wait - why must the metal be removed? what keeps it from bolting right up?
I've also decided to try my hand at metal spinning to make some velocity stacks. Cool process.