• There has been a recent cluster of spammers accessing BARFer accounts and posting spam. To safeguard your account, please consider changing your password. It would be even better to take the additional step of enabling 2 Factor Authentication (2FA) on your BARF account. Read more here.

60's Honda CL 160 Rebuild as Racer

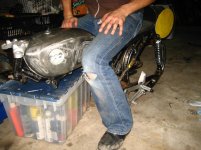
Well, here they are: some terribly pitted CL 160 forks repaired with JB weld. I sanded with 220, 400, 600 and 1000 and they feel pretty good. I think they'll hold up. Now that I feel confident with this pair I'll go ahead and patch up the less severe pitting on my CB fork and use that set. Glad to finally have the fork debacle sorted out. Included is a shot of the forks pre-JB. A little after(top row)/before (bottom right) action.

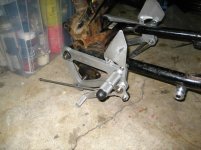
Made a trip to Metal Supermarket today. I should be able to start machining the rearsets as soon as tomorrow. :)
 

Attachments

  • ForksJB1.jpg
    ForksJB1.jpg
    188.8 KB · Views: 38
  • ForksJB2.jpg
    ForksJB2.jpg
    171.6 KB · Views: 39
  • MetalSupermarket.jpg
    MetalSupermarket.jpg
    216.1 KB · Views: 37
  • pitting 2.jpg
    pitting 2.jpg
    214 KB · Views: 38
Last edited:
REARSETS!

Just a few more finishing touches but they're 90% done. I'm very happy with the way they've turned out so far. :)

If I were to do them again I would make some changes, mostly to improve the machinability. I did at least do one clever thing: the delrin slider is actually the standard bar end slider that comes with any clip on bar. Cheap to get and don't require any machining.

When I run out of room in the corner of the laundry room I expand into the damp dirt floored "alcove."
 

Attachments

  • LeftRearset.jpg
    LeftRearset.jpg
    55.3 KB · Views: 38
  • Right Rearset1.jpg
    Right Rearset1.jpg
    68.9 KB · Views: 40
  • Skeleton.jpg
    Skeleton.jpg
    68.2 KB · Views: 42
Last edited:
Just a few more finishing touches but they're 90% done. I'm very happy with the way they've turned out so far. :)

If I were to do them again I would make some changes, mostly to improve the machinability.

Interesting project and nice job on the design & machining. It looks like your swingarm axle is long to go through a bit of extra stock without a problem.

Keep up the good work!
 
It looks like your swingarm axle is long to go through a bit of extra stock without a problem.

Keep up the good work!

Not sure I understand what you mean. Are you referring to the fact that there isn't much thread sticking out from the axle nut? If so I plan on buying a shorter shear nut or possibly castelated nut then drilling a hole in the axe threads and retaining the nut with an aircraft clip or cotter pin. This will provide peace of mind and meet AFM tech requirements. The nut that came on the axle is a locking type nut and is much taller than a standard nut. You can see it in the first pic I posted, with the rearsets on the floor.
 
Looking at your second photo (latest group) it appeared to me that your swingarm axle did in fact have threads punched through past the end of the nut. Maybe I'm wrong about that. Since you don't have the motor installed in that photo, I imagine you also didn't have the axle nut torque'd to spec. And if that's true, then you will probably see even more threads once you torque it enough to compress all of the pass through materials.
 
Any new progress? This if very exciting following your build.

If I haven't said it before.... if you happen to hear about any other CB 160's for sale in your travels locating parts etc. please let me know. I am very ready to start my own 160 project.
 
This is a great thread. I wish I had the garage/tools/skills/patience to do something like this myself...I am going to have Charlie O'Hanlon at Charlie's place put together a CB350 Cafe bike for me. This is my inspiration:

0023.JPG

That is very inspirational Gabe.. very tidy, nice work.. A local bike?
 
I had my last final on Thursday. Engineering final, pretty wicked so I was studying instead of building for a change. Had to take care of some other stuff after that but now I'm back to work this afternoon. I'll keep the updates coming!

If you're looking for a 160 or 175 you should definitely get on the yahoo group. Those guys will set you up. One of the guys, Craig Haggart, may even have one for sale. He's posted on this thread so you could contact him directly. I also posted some links earlier in the thread to the yahoo groups and other 160 resources. Check them out. The group of 160 racers has been one of the most helpful, friendly group of motorcyclists - or people even - I have met.

:thumbup
 
Finally got some more work done. The rearsets are finished :)
I got deals on metal so the whole thing ended up costing me about $60. I did drop $5 at Bowlin for bolts and nuts but I had the shift rod, so $65 total is pretty good.

I also replaced the "locking" nut on the end of the swingarm pivot with a shorter castle nut so I can drill a hole through the threads on the pivot and secure the nut with a hairpin clip. You can see the new nut in the last photo.

Band Aid on the thumb is a sure sign I was in the machine shop today.
 

Attachments

  • RearsetsMount5.jpg
    RearsetsMount5.jpg
    225.5 KB · Views: 45
  • RearsetsMount4.jpg
    RearsetsMount4.jpg
    80 KB · Views: 41
  • RearsetsMount3.jpg
    RearsetsMount3.jpg
    81.2 KB · Views: 41
  • RearsetsMount2.jpg
    RearsetsMount2.jpg
    241.7 KB · Views: 46
  • Rearsets1.jpg
    Rearsets1.jpg
    78 KB · Views: 45
Finally got some more work done. The rearsets are finished :)
I got deals on metal so the whole thing ended up costing me about $60. I did drop $5 at Bowlin for bolts and nuts but I had the shift rod, so $65 total is pretty good.

I also replaced the "locking" nut on the end of the swingarm pivot with a shorter castle nut so I can drill a hole through the threads on the pivot and secure the nut with a hairpin clip. You can see the new nut in the last photo.

Band Aid on the thumb is a sure sign I was in the machine shop today.

Gorgeous!
 
Looking good. Those rear sets look really well made. How's the motor coming along? And any progress on the wheels?
 
Thanks!

Motor:

I'm awaiting some income soon, at which time I'll be able to buy gaskets for the engine and get it back together. In the meantime I'm going to do a little port work and maybe lap the valve seats. And I'm still trying to get a touch of rust off one or two components.

Wheels:

I've decided to use my rims. I ordered spokes from overseas and should see them in a week or two, maybe a little longer. I'm trying to remove every last bit of rust and then clearcoat the rims to prevent future rust. That should be done in the next few days.

What else?

I'm doing a little more paint stripping, going to make a bracket for a front number plate and weld that on to the frame, weld on some extensions for the lower rearset mount (already machined them, visible in the first pic in my last post), seal the gas tank, make the hagon shocks fit on the CL upper shock mounts...
 
Last edited:
This is a great thread. I wish I had the garage/tools/skills/patience to do something like this myself...I am going to have Charlie O'Hanlon at Charlie's place put together a CB350 Cafe bike for me. This is my inspiration:

0023.JPG

Thanks for posting that photo, Gabe, and the info. I missed it my first time reading the thread. Seems like they took some similar steps to what I intend to do to further improve my 1969 CL:

picture.php


Right now there are three bikes that we are working on in my garage (and one at a friends). 2 of those are current runners that need minor work (such as fabrication of rearsets for my Titan which i still need to pm twitch about).

One of the non-runners is a 66 CB160 which is going to stay bone stock. (no CB160 Racer for my wife unfortunately)
 
I took a look at that CB350 build and it turns out that bike was actually built by students at a different high school, Ketcham.

http://www.toolboxpro.org/classrooms/template.cfm?ID=1555&preview=1

The Nisky boys did a different take. Theirs is the one on the left. The Nisky site has a very comprehensive build with tons of photos. The Ketcham, unfortunately, has some but not nearly enough.

It was a competition and the Ketcham bike wins hands down.:applause

It also looks like the Nisky team had a lot of nice parts contributed while the other team was working with considerably less. See? Anodized air intakes and a giant tumorous tach don't always beat solid, simple design. The Nisky team would have done much better if they used a different exhaust, different paint, fewer colors (bright blue shock springs!?), simple monochrome engine paint and lost that aluminum sheet that's acting as a mudguard. But that's just me :ride
 

Attachments

  • Nisky.jpg
    Nisky.jpg
    122.3 KB · Views: 101
I took a look at that CB350 build and it turns out that bike was actually built by students at a different high school, Ketcham.

http://www.toolboxpro.org/classrooms/template.cfm?ID=1555&preview=1

The Nisky boys did a different take. Theirs is the one on the left. The Nisky site has a very comprehensive build with tons of photos. The Ketcham, unfortunately, has some but not nearly enough.

It was a competition and the Ketcham bike wins hands down.:applause

It also looks like the Nisky team had a lot of nice parts contributed while the other team was working with considerably less. See? Anodized air intakes and a giant tumorous tach don't always beat solid, simple design. The Nisky team would have done much better if they used a different exhaust, different paint, fewer colors (bright blue shock springs!?), simple monochrome engine paint and lost that aluminum sheet that's acting as a mudguard. But that's just me :ride

Thanks for correcting me.

I think the Nisky bike was built for racing, hence the more utilitarian look. If you've seen AHRMA bikes, you'll know most of them are pretty ugly. Function over form. Thos shocks are Works Performance, which are outstanding products. My FT500 roadracer was very fast on a tight track, and I don't think I've ever gone faster at Sears than I did on that thing.

I'd like my finished bike to be more of an AHRMA racer for the street than a stylish cafe-racer to park on the grass of some resort's golf course. But who knows? This might really suck to ride...
 
Got a lot done today. Hope this isn't dragging on too slowly for you guys. I know those OCC dudes can cobble an entire chopper together in under an hour, minus commercials. I'll try to wick up the pace. :teeth

I got the dremel out and stripped the last bits of rust from one rim. When I went after the other one, the really bad one, I discovered that the spoke holes were more rust than metal. Not safe, so that rim is in the junk pile and I'm looking for another one.

Cleaned the rust off the rear axle and bushing, polished with fine grit sandpaper. Among other things I'm a little crazy about pivots. I like them as smooth as possible and well lubricated. Hopefully I'll have one less weak link in the suspension.

The chain adjusters are gnarly. They'll work, but I'd rather use something in better shape. I might fab something up quick, dig around for a cheap used option, or just stick with what I've got.

I carefully removed the seat pad (so it can be reused). Well ok, Donna, my girlfriend did. Then I stripped the paint. Tabula rasa.

Nuts: Here is a shot comparing a few nuts. In the center is the original swingarm pivot bolt. To the left is the nut I replaced that one with. It is a castle nut, and quite a bit shorter than the original giving me room to play with rearset spacers and placement of the upcoming cotter pin. To the right is the rear axle nut.

I also thoroughly cleaned out the stock petcock and am trying to figure out a way to use it in conjunction with a dry quick disconnect fitting. These little details seem to give me the most trouble.
 

Attachments

  • RimRust.jpg
    RimRust.jpg
    185.9 KB · Views: 43
  • Axle.jpg
    Axle.jpg
    78.9 KB · Views: 36
  • Metal.jpg
    Metal.jpg
    91.2 KB · Views: 41
  • Metal2.jpg
    Metal2.jpg
    85.5 KB · Views: 41
  • Nuts.jpg
    Nuts.jpg
    213.9 KB · Views: 37
Last edited:
Got a lot done today. Hope this isn't dragging on too slowly for you guys.

Coming along just fine. When we're jonesing for updates you'll know it.

Too bad about that rim, but I wonder why keep the chromed steel ones anyway... wouldn't it be beneficial to replace them with aluminum hoops?

I like what you've done with the seat pan. This is going to be fun to watch the updates as the come. :thumbup
 
Back
Top