• There has been a recent cluster of spammers accessing BARFer accounts and posting spam. To safeguard your account, please consider changing your password. It would be even better to take the additional step of enabling 2 Factor Authentication (2FA) on your BARF account. Read more here.

RZ350 re-frame... classic 2-stroke gets modern upgrade

Definitely went in the right direction IMO. In that first photo you showed I was like WTF because I thought the sticking out tail of the right-hand side was part of the left-hand side. I think it is looking really good Julian trimmed down like this. You sure know how to do stuff don't you? :thumbup
 
This weekend more progress was made on modeling of the tail. Specifically I worked on the left side. I agree with Lonster's comments that both tail concepts look a bit large.

-SNIP-

Am I going in the right direction with this exploration:dunno

I like that MUCH better. I also like the tails on the Tigcrafts that have surfaced on BARF lately.
Thanks for all the updates! Looking Good! :thumbup
 
Looks awesome. Proportionately I would go maybe 5-10% smaller. But I like small butts on bikes so I'm biased. Also, modern bikes have tiny butts, so maybe I've become accustomed to them.
 
Looks awesome. Proportionately I would go maybe 5-10% smaller. But I like small butts on bikes so I'm biased. Also, modern bikes have tiny butts, so maybe I've become accustomed to them.


I'm actually not a fan of the current assless look.
 
I've just begun a new phase, so here is a quick update...

I had some of my nice coworkers use their fancy scanner to scan the clay tail. This is what the output looks like:

Tail scan 0.0 by andbike, on Flickr

Once oriented in my CAD software, I cut away the half that isn't being modeled and begin creating CAD surfaces using the scan for references:

Tail scan 0.1 by andbike, on Flickr


The clay surfaces are lumpy and uneven, so it's nice to see perfect CAD surfaces:

Tail scan image 1.0 by andbike, on Flickr

Tail scan image 1.1 by andbike, on Flickr

Tail scan image 1.2 by andbike, on Flickr


Now I can finally mirror the left side to the right and see what the complete shape will look like:

Tail scan 2.0 by andbike, on Flickr

Tail scan 2.1 by andbike, on Flickr

Tail scan 2.2 by andbike, on Flickr

Tail scan 2.3 by andbike, on Flickr

I still have a lot of tuning and features to add, so stay tuned for more CAD updates!
 
Last edited:
I like. Maybe square off the rear and mount the tailight flush with the body work? I'm impressed with the computer work too!
 
I like. Maybe square off the rear and mount the tailight flush with the body work? I'm impressed with the computer work too!

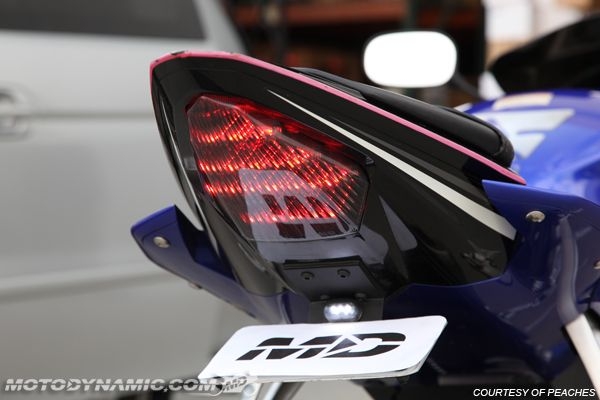
The current plan is to use a 2006+ R6 tail light mounted to the underside. It will be blended into the bodywork.

Glad you like the progress and the CAD work:thumbup Admittedly, SolidWorks isn't the greatest tool for doing surfaces, but its what I have and I know it pretty well.:teeth

y-8r6-s1.jpg
 
Looks great! Very interested to hear how you're going to make the finished part. Can you 3d print a mould in two halves?
 
Looks great! Very interested to hear how you're going to make the finished part. Can you 3d print a mould in two halves?

The plan is to 3D print a set of parts directly from the CAD model. Those will then be fine tuned to get the surfaces perfect and trimmed as needed to fit the bike. Then those parts will be sent to a friend who does fiberglass work (he builds race car bodies for a living). He will make molds from the 3D printed parts and then make final parts in fiberglass.

Why add a taillight at all? I thought this was a track-only project.

Not at all. I've probably mentioned that one frame has already been sent to a race team for track testing, but my personal bike(s) will be street legal and hopefully ridden often.
 
Who's ready for a big update?


Here we go!

A few days ago this big box arrived in the mail...

20230207_175652 by andbike, on Flickr

Inside were the long awaited 3D prints of the tail made directly from my CAD model...

20230207_180717 by andbike, on Flickr

20230207_181934 by andbike, on Flickr


Next step is to attach the left and right sides of the tail. The material is PLA (polylactic acid) and it is very easily glued with CA (cyanoacrylate) or more commonly known as superglue. Turns out superglue works really well with baking soda as a filler. So with some baking soda and superglue in hand, its a pretty easy task attaching the two halves. And lots of tape to hold the halves while glue is applied...

20230207_200319 by andbike, on Flickr

In case you don't know what baking soda looks like...:teeth

20230207_200329 by andbike, on Flickr

Baking soda to fill the gaps and then superglue dripped over the seam...

20230207_201228 by andbike, on Flickr


And now we have a tail!

20230208_093553 by andbike, on Flickr


And also the first Oh Shit moment! Notice the faceted surfaces? It turns out that I forgot to turns some knobs on my CAD software when I was exporting the files for the 3D prints. The export file format is STL which is just a bunch of little triangles. In this case they exported as large (course) triangles. Oh well, not gonna re-do the prints. This just means there's going to be lots and lots of sanding and filling, and more sanding, followed by more filling... until everything is smooth.

20230208_093528 by andbike, on Flickr


I'm using very expensive automotive grade primer that is "fast filling" and easy to sand, along with lots of spot putty...

20230208_223212 by andbike, on Flickr


Here you can again see the faceting...

20230208_223256 by andbike, on Flickr


And even more so after the first round of sanding...

20230209_192917 by andbike, on Flickr


I would spend several days sanding, priming, filling, and sanding all over again. Finally the weekend is here and I get over to my shop and for the first time I put the tail on the bike. Before doing this, I was worried the tail would look too wide and kinda odd. But I was really happy that it looks so good, and the width is just fine. It follows the tank very well. I couldn't be happier:banana

20230211_111810 by andbike, on Flickr

20230211_111819 by andbike, on Flickr

20230211_111833 by andbike, on Flickr

20230211_111856 by andbike, on Flickr

20230211_112023 by andbike, on Flickr

(note: there is a lot of camera distortion making the tail look wider than it is)

20230211_112053 by andbike, on Flickr


This update just gets us up to Saturday morning. We still have a full weekend update, so stay tuned:party
 
The tail looks great Julian. Lots of effort there. Is this a final product? Or something you will make a mold out of? I think the latter.
 
Kind of liked the facets. Tron Time.
Nobody else would have one.
 
Looks good and fits the bikes flow nicely.
 
The tail looks great Julian. Lots of effort there. Is this a final product? Or something you will make a mold out of? I think the latter.

The plan is to make molds from the 3D prints, then make duplicates in fiberglass.

I <3 this thread

:thumbup

Kind of liked the facets. Tron Time.
Nobody else would have one.

Hah!. I guess I'll have to do some very careful sanding of the gas tank so it will match!

Looks good and fits the bikes flow nicely.

:thumbup
 
Looks fantastic! Coming along nicely.
 
Back
Top