This past week's progress:
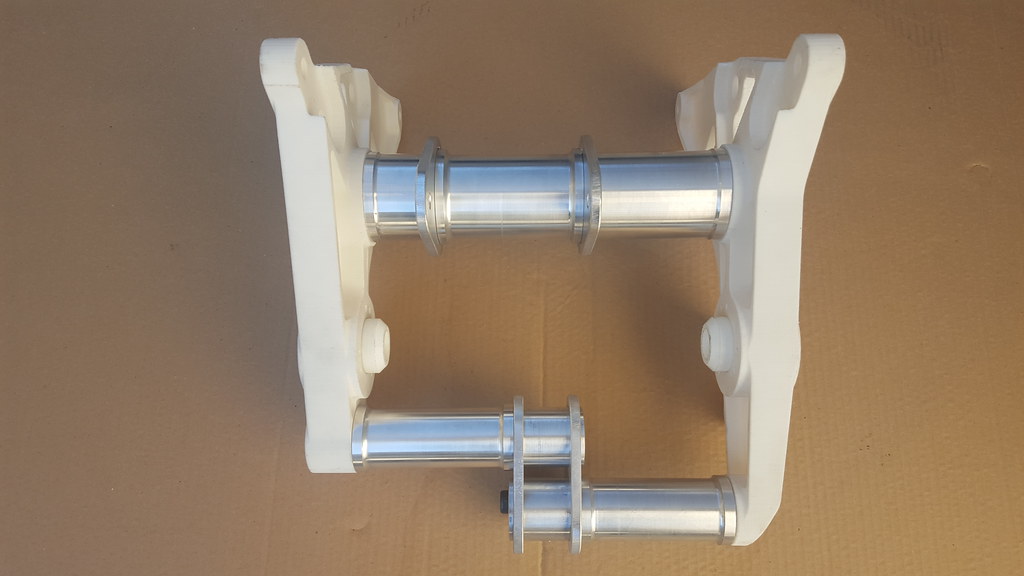
With the 3D prints now in hand, it's time to build a mock-up of the mid-frame and see how it fits to an RZ350 engine. In the shop I turn the cross tubes for the mid-frame. Some scraping with a utility knife is needed to smooth and remove a small amount of material from the 3D prints to get the aluminum cross tubes to a nice press fit. The 1/4" plate engine mounts and lower suspension mounts have already been laser cut a few weeks ago.
 20210206_161119
 by
andbike, on Flickr
My aluminum welding skills are virtually non-existent, but I manage to tack weld the plates to the tubes and assemble the mock-up.
 20210207_113335
 by
andbike, on Flickr
 20210207_113403
 by
andbike, on Flickr
With the mid-frame mock-up completed, time to see how it fits... Oh Shit! It kinda doesn't fit. Well, this is exactly why I made the 3D prints
before spending real money on CNC machined aluminum parts. So I'm glad to catch this interference early.
There is an area where the 3D printed side plate is interfering with the clutch cover. Using my Dremel with a small saw, I trim away some material and now the mid-frame will fit, although I don't like how the clutch cover is now captured under the plate and can't be removed with the engine in place.
 20210207_142245
 by
andbike, on Flickr
 20210207_150045
 by
andbike, on Flickr
I'll readdress this issue later and possibly make some design changes to the side plate. On the left side there is an interference with the left side engine cover. If I use the original RZ350 side cover the interference is significant, although the left side covers are plastic and can be trimmed. The interference is only in the area that covers the c/s sprocket so nothing structural or containing fluids would be compromised. If I swap to a Banshee left side cover the interference is very minimal. The RZ side covers are getting scarce while the Banshee covers are still available from Yamaha. So that will be the solution.
Also this past week more laser cut brackets arrived so I can finalize the seat mounts. I love how they blister pack everything so nothing falls out of the packaging. I've used laser cutting vendors in the past who possibly never had customers from remote locations and their packaging was horrible. Anyway, the flat brackets are easily formed to final shape.
 20210207_134904
 by
andbike, on Flickr
One bracket is for the center tongue on the seat. The other brackets are for the rear screw mounts. The rear brackets are intentionally long and require some sanding to remove material for final fit.
 20210208_121011
 by
andbike, on Flickr
 20210208_132508
 by
andbike, on Flickr
Then a few tack welds to confirm fit, followed by final welding and the seat is ready to be mounted.
 20210208_141213
 by
andbike, on Flickr
 20210208_143347
 by
andbike, on Flickr
When I first started building frames I would use rivet-nuts any place where I couldn't access the back side to place a normal nut. Now I like to use these clip-nuts. They work very well and if they ever get stripped or damaged just throw away and use another one. Super handy.
 20210208_160246
 by
andbike, on Flickr
I have a fiberglass tail for a KTM cup bike that I like the shape, however it doesn't fit to the R6 seat very well. For now I'll use a Yamaha replica tail just to see how the bike will look with a race tail. At first I try one based on 99-02 R6 to see how it looks.
It looks much better than the utility rack I had used for the Dirtbag ride, but it still looks kinda clunky.
 20210209_114305
 by
andbike, on Flickr
 20210209_114644
 by
andbike, on Flickr
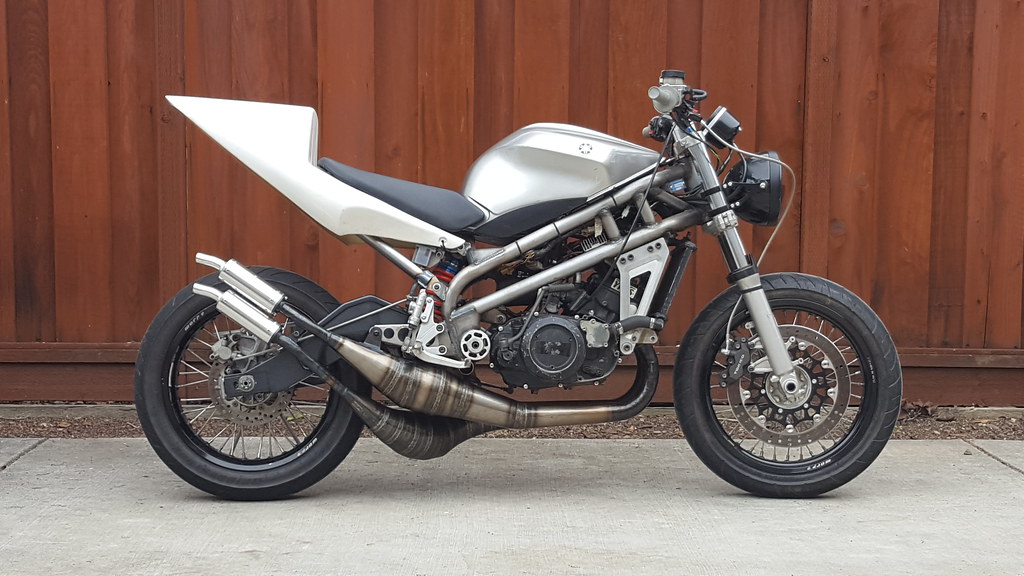
Next I try a replica tail for a 03-05 R6. Its a little lower and seams to follow the styling of the tank much better. This is an improvement and I'm finally starting to get aroused by how the bike is looking

arty
 20210209_145410
 by
andbike, on Flickr
The long term goal is to sculpt a tail that fits properly to the R6 seat, but has the rear portion based on the KTM cup bike tail. But that effort will wait. For now the priority is getting the frame re-design finalized.
More to come...


 so not sure when the next progress update will happen.
 Anyway, enjoy the Blingtasticness!