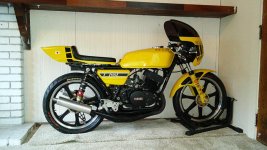
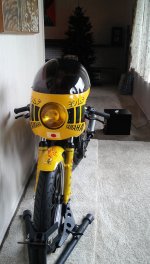
I should start this update by mentioning how awesome my wife is!

She took sympathy on me and allowed the rolling chassis into the house on Sunday to avoid the heat outside.
 20210829_161811
 by
andbike, on Flickr
The plan for Sunday was to modify a few small parts in CAD and design a few new parts. Two of the part were the left and right exhaust mounting brackets. Because the mid-frame has changed, the left side bracket will now be aluminum and welded to the mid-frame. Also need to see if the right side bracket should change or not?
First step is to mock-up the exhaust on the rolling chassis.
 20210829_130749
 by
andbike, on Flickr
From here I can measure and evaluate the mounting points.
 20210829_130801
 by
andbike, on Flickr
 20210829_130922
 by
andbike, on Flickr
The right side pipe can be tucked up a little closer to the frame, so this side will also require a new bracket.
 20210829_130825
 by
andbike, on Flickr
This is what the new left side bracket looks like in CAD
 exbracket, left side 2.0.1
 by
andbike, on Flickr
This would be an easy part to CNC machine... but I'm on a budget and want to minimize parts sent out for CNC machining. So this is where I get clever. By ganging 3 brackets together and adding material between them I can have the profile laser cut, then machine the contoured surface on my lathe. Last step will be to cut the brackets apart and sand down the remnants from the connections. That's the plan at least.
 exbracket, left side 2.0
 by
andbike, on Flickr
On the right side, I simply adjust the sheet metal bracket for the slightly higher mounting.
 bracket, exhaust, long 2.0
 by
andbike, on Flickr
Next is to design the torque bracket for the bottom of the engine. This is easiest done with the bike upside down.
 20210829_165756
 by
andbike, on Flickr
There are two mounting points on the lower engine case that need to be tied to the mid-frame with a plate.
 20210829_212131
 by
andbike, on Flickr
With measurements taken from the bike, the plate and details get modeled in CAD.
 torque brace
 by
andbike, on Flickr
As one last check, I do a paper test print. Looks good!
 20210829_193627
 by
andbike, on Flickr
Today I have a bunch of profiles to send off for laser cutting. With luck, should have cut parts by Friday just in time for another very warm weekend

And hopefully the missing ingredient for bodywork development should arrive this week and we'll see if that solves how the items in the three trivia photos are used.

arty


 Much to my dismay, they were sold out of the key ingredient that I went there for. Luckily I found what I needed on the interwebs. It should arrive next week, and will help to solve the trivia question... unless someone figures it out first.