• There has been a recent cluster of spammers accessing BARFer accounts and posting spam. To safeguard your account, please consider changing your password. It would be even better to take the additional step of enabling 2 Factor Authentication (2FA) on your BARF account. Read more here.

RZ350 re-frame... classic 2-stroke gets modern upgrade

Ken, go ahead and start bring parts over and organize them in my living room, then set up a bed in your pool house... because that's where I'll be sleeping:(
 
:hail

I love this thread.

I did like the tail a little higher though, because streetfighter :)

Oven is for tempering plasticine clay. Tools are for carving clay. No idea what the horse hair looking stuff is for.
 
Hey Mike, good to have you jump into the conversation. Any cool Ducati projects going on with you?

Not sure what you mean by "tempering plasticine clay". I've never heard that exact phrase used. Please explain?

Correct on the clay tools:thumbup

The "horse hair" looking stuff is actually Sisal hemp.
 
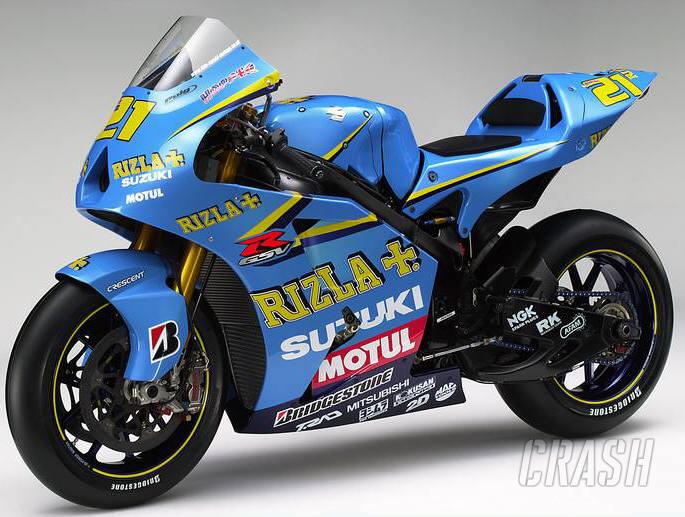
You'll be going with the Rizzla paint scheme then?

That took me a minute to figure out... but no, its not THAT type of hemp.:rofl

Rizla does have a nice team paint scheme though.
195993.jpg
 
The missing ingredient finally arrived today... all 50lbs of it! That's much more than I will need for this project, but it was a great deal from a private seller who needed to unload a bunch. And it doesn't go bad, so it can be used on a future project (tail for my RZ500 frame project maybe).

20210907_200448 by andbike, on Flickr

20210907_200458 by andbike, on Flickr

20210907_200709 by andbike, on Flickr

Meanwhile after work earlier today some woodworking happened...

20210907_185323 by andbike, on Flickr

20210907_190041 by andbike, on Flickr

Wood... clay... this is getting kinda weird for a moto project:dunno
 
I'm loving this stuff, Julian. :cool
Best thread ever. Keep it coming!
 
I've gotten a bit behind on updates, so hopefully this will get us up to date...

Last weekend (10 days ago) I built a removable sub-frame-like structure that will be used to support the tail buck. The buck is what I will be using to shape the new tail form. It is designed such that it can be attached and removed from the existing sub-frame via slip-fit joints. This is such that the majority of modeling can be done on a modeling board (grid layout) but then the buck can be installed onto the bike for visual reference. I hope that makes sense?

Anyway, here's the fabrication of the sub-frame/buck support structure.

20210904_120908 by andbike, on Flickr

20210904_124111 by andbike, on Flickr

20210904_124947 by andbike, on Flickr

20210904_124924 by andbike, on Flickr

20210904_133852 by andbike, on Flickr


I will be cutting the seat surround surfaces off of an R6 tail and adding that to the buck so that I have an accurate surface where the seat resides.

20210904_141537 by andbike, on Flickr

20210904_142503 by andbike, on Flickr

20210904_155621 by andbike, on Flickr

20210904_154701 by andbike, on Flickr

20210904_154701 by andbike, on Flickr

The final buck support will get layers of plywood, then built up with clay. The clay will then be shaped and become the mold buck for the new tail. Hopefully begin that process in a few weeks.

20210904_155127 by andbike, on Flickr

Here are the wood supports that will be used to support the buck. The tall support is angled to the correct angle as on the bike, while the lower support will be used when detailing the final shape as it will hold the buck close to modeling board thus being more accurate when translating reference points from side to side. That should make much more sense later on.

20210907_224241 by andbike, on Flickr

20210907_230354 by andbike, on Flickr
 
Some time was also spent last weekend to re-install the dual shock specific swingarm back onto the prototype bike. This required adding brackets to the new sub-frame that has been started for the that bike.

20210905_125158 by andbike, on Flickr

20210905_125210 by andbike, on Flickr

20210905_125219 by andbike, on Flickr

20210905_135157 by andbike, on Flickr

That same afternoon I made the left side exhaust brackets. Remember the CAD images of the three brackets ganged together... this is the laser cut part.

20210905_140828 by andbike, on Flickr

Then a little lathe worked followed by cutting apart and final edge cleanup on a sander.

20210905_150556 by andbike, on Flickr

Note the shims added under each jaw so that I could machine to the edge of the part.

20210905_153021 by andbike, on Flickr

The part is kinda flimsy so there was some bad chatter, but the chatter was worst on the throw-away area so not too worried about it.

20210905_153115 by andbike, on Flickr

I put the part back in the lathe for one last pass only removing 0.005" of material to clean up most of the chatter. They came out nice!

20210905_155008 by andbike, on Flickr

20210905_155537 by andbike, on Flickr

Fit check looks good :thumbup

20210905_185426 by andbike, on Flickr
 
This past weekend I spent Saturday replacing the brakes on my wife's car, so this update is very short. I did get a little bit of time on Sunday, so made a fixture that will be used for locating the upper sub-frame mounting tabs on the main frames. Hopefully the process is self-explanatory.

Started with a crossbar that bolts into the mid-frame and connects to the shock mount.

20210912_135538 by andbike, on Flickr

Then arms added that locate the sub-frame mounting tabs.

20210912_150024 by andbike, on Flickr

Very simple fixture is done.

20210912_153050 by andbike, on Flickr

Stay tuned, lots more to come! :party
 
This update might not be very exciting as the weekend activities became very redundant. A lot of this happened...

20210919_174509 by andbike, on Flickr

along with some of this...

20210919_174517 by andbike, on Flickr

Along the way some diagonal pieces were adjusted for final fit...

20210919_155011 by andbike, on Flickr

followed by much more of this...

20210919_174624 by andbike, on Flickr

20210919_174500 by andbike, on Flickr

The weekend goal was to get diagonals mounted to all three frames and get as much welding done as possible. By Saturday night after 9 hours of welding and fitting diagonals I had one frame about 75% welded. I didn't get as much done as I had hoped and to make things worse the frame had some significant distortion and would no longer fit to the mid-frame assembly.

The first frame looks good, but fit not so good...

20210918_185344 by andbike, on Flickr

20210918_185328 by andbike, on Flickr

20210918_185313 by andbike, on Flickr

Sunday morning involved use of heavy equipment, car scissor jacks, and big pry bar to get the frame back into alignment. It was kinda ugly process.

The distortion was the result of much welding being done with the frame removed from the main fixture. The solution going forward was to make a small fixture that would hold the rear of the frame in place while welding on the front.

this would take a few hours on Sunday to build...

20210919_134425 by andbike, on Flickr

20210919_175635 by andbike, on Flickr

20210919_144332 by andbike, on Flickr

20210919_144341 by andbike, on Flickr

This little fixture seamed to do the charm as the second frame came out almost perfect and fit to the mid-frame was perfect:thumbup

20210919_174614 by andbike, on Flickr

20210919_174609 by andbike, on Flickr

And that wraps up this week's update. :party
 
It's already looking super sexy.
I showed the progress to my wife in preparation for someday, potentially getting one of these frames or rollers from you. It helps having the S.O. on board.
As has been said by others, nice work!
 
It's already looking super sexy.
I showed the progress to my wife in preparation for someday, potentially getting one of these frames or rollers from you. It helps having the S.O. on board.
As has been said by others, nice work!

:thumbup

Just out of curiosity, any chance you'll be attending the 2-stroke Extravaganza in a few weeks? I'm hoping to bring the prototype and one of the gen2 frames even if not finished.
 
Not this year. 10+ hours each way. Not counting traffic.
 
Nice. But does the missus make biscuits?

If I were a rich man you and Milyard would build my next moto. His engine in your frame to my inseam size would be perfection on bike night.

And ya' hafta' have biscuits to pass around.

Subscribed
 
Nice. But does the missus make biscuits?

If I were a rich man you and Milyard would build my next moto. His engine in your frame to my inseam size would be perfection on bike night.

And ya' hafta' have biscuits to pass around.

Subscribed

Ha! I'd love to team up with Alan Milyard and build a frame around one of his engines. That would be amazing!

As for Mrs. Frame Maker, she makes some amazing cowboy cookies from an old family recipe. I'll try to post pictures next time I see a batch in the kitchen:party
 
Here's a short mid-week update.

I wanted to prepare the upper and lower head tube gussets but first needed to make a narrow bend plate (not sure if that's the correct term?). The new deign of the upper gusset has a double bend, so the second bend won't lay flat on a large surface. The solution was to mill a slot into a narrow block of aluminum.

20210920_193245 by andbike, on Flickr

20210920_194647 by andbike, on Flickr

With the narrow bend plate, I could easily create the bends using a Swag Off Road press brake.

20210921_185324 by andbike, on Flickr

20210921_190733 by andbike, on Flickr

I didn't get a picture of the process of creating the second bend in the top gusset, but it worked very well using the narrow plate such that the first bend could hang over the edge with the mid-area flat on the plate.

4 sets of gussets ready for welding to frames.

20210921_190903 by andbike, on Flickr
 
Back
Top